> ## Documentation Index
> Fetch the complete documentation index at: https://docs.unstructured.io/llms.txt
> Use this file to discover all available pages before exploring further.
# Unstructured API on Azure
The Unstructured API on Azure is deprecated. It is no longer supported and is not being actively updated.
Unstructured is now available on the Azure Marketplace as a private offering. To explore supported options
for running Unstructured within your virtual private cloud (VPC), email Unstructured Sales at
[sales@unstructured.io](mailto:sales@unstructured.io).
This page is not being actively updated. It might contain out-of-date information. This page is provided for legacy reference purposes only.
Follow these steps to deploy the Unstructured API service into your Azure account.
This article describes how to create several interrelated resources in your Azure account.
Your Azure account will be charged on an ongoing basis for these resources, even if you are not actively using them.
Manually shutting down the associated Azure virtual machine when you are not using it can help reduce—but not fully eliminate—these ongoing charges.
To stop accruing all related ongoing charges, you must delete all of the associated Azure resources.
Go to [https://portal.azure.com](https://portal.azure.com/).
Go to the [Unstructured Data Preprocessing - Customer Hosted API](https://azuremarketplace.microsoft.com/en-us/marketplace/apps/unstructured1691024866136.customer_api_v1?tab=Overview/) offering in the Azure Marketplace.
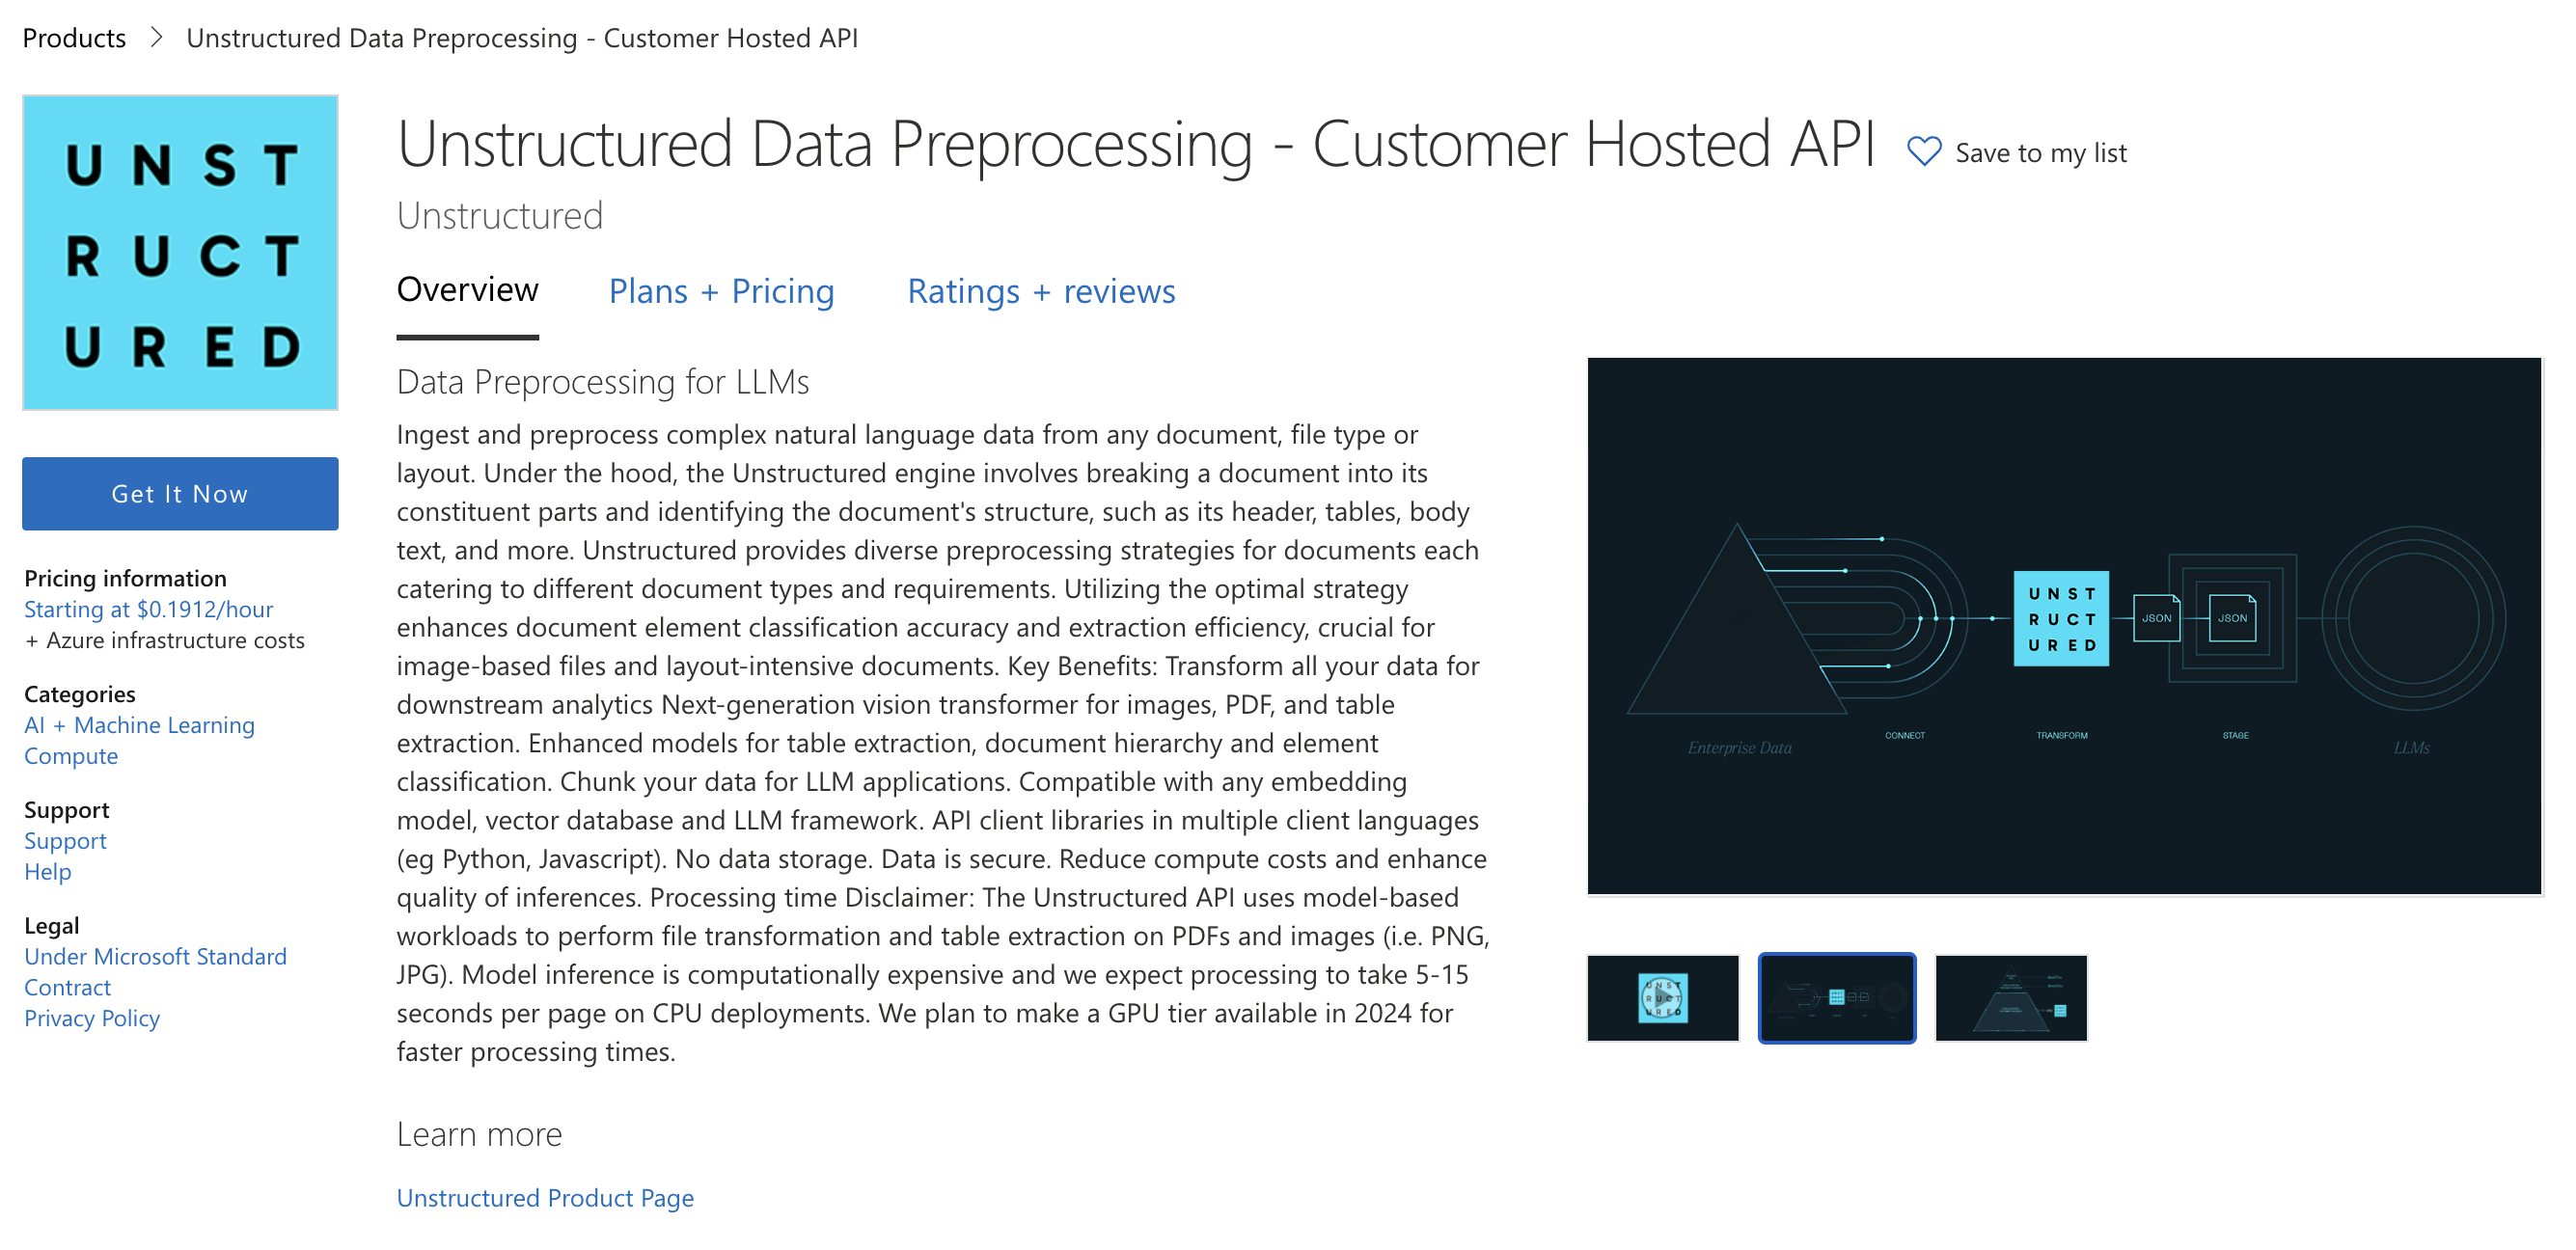 1. Click **Get It Now** and fill out the form.
2. Read the terms and click **Continue**.
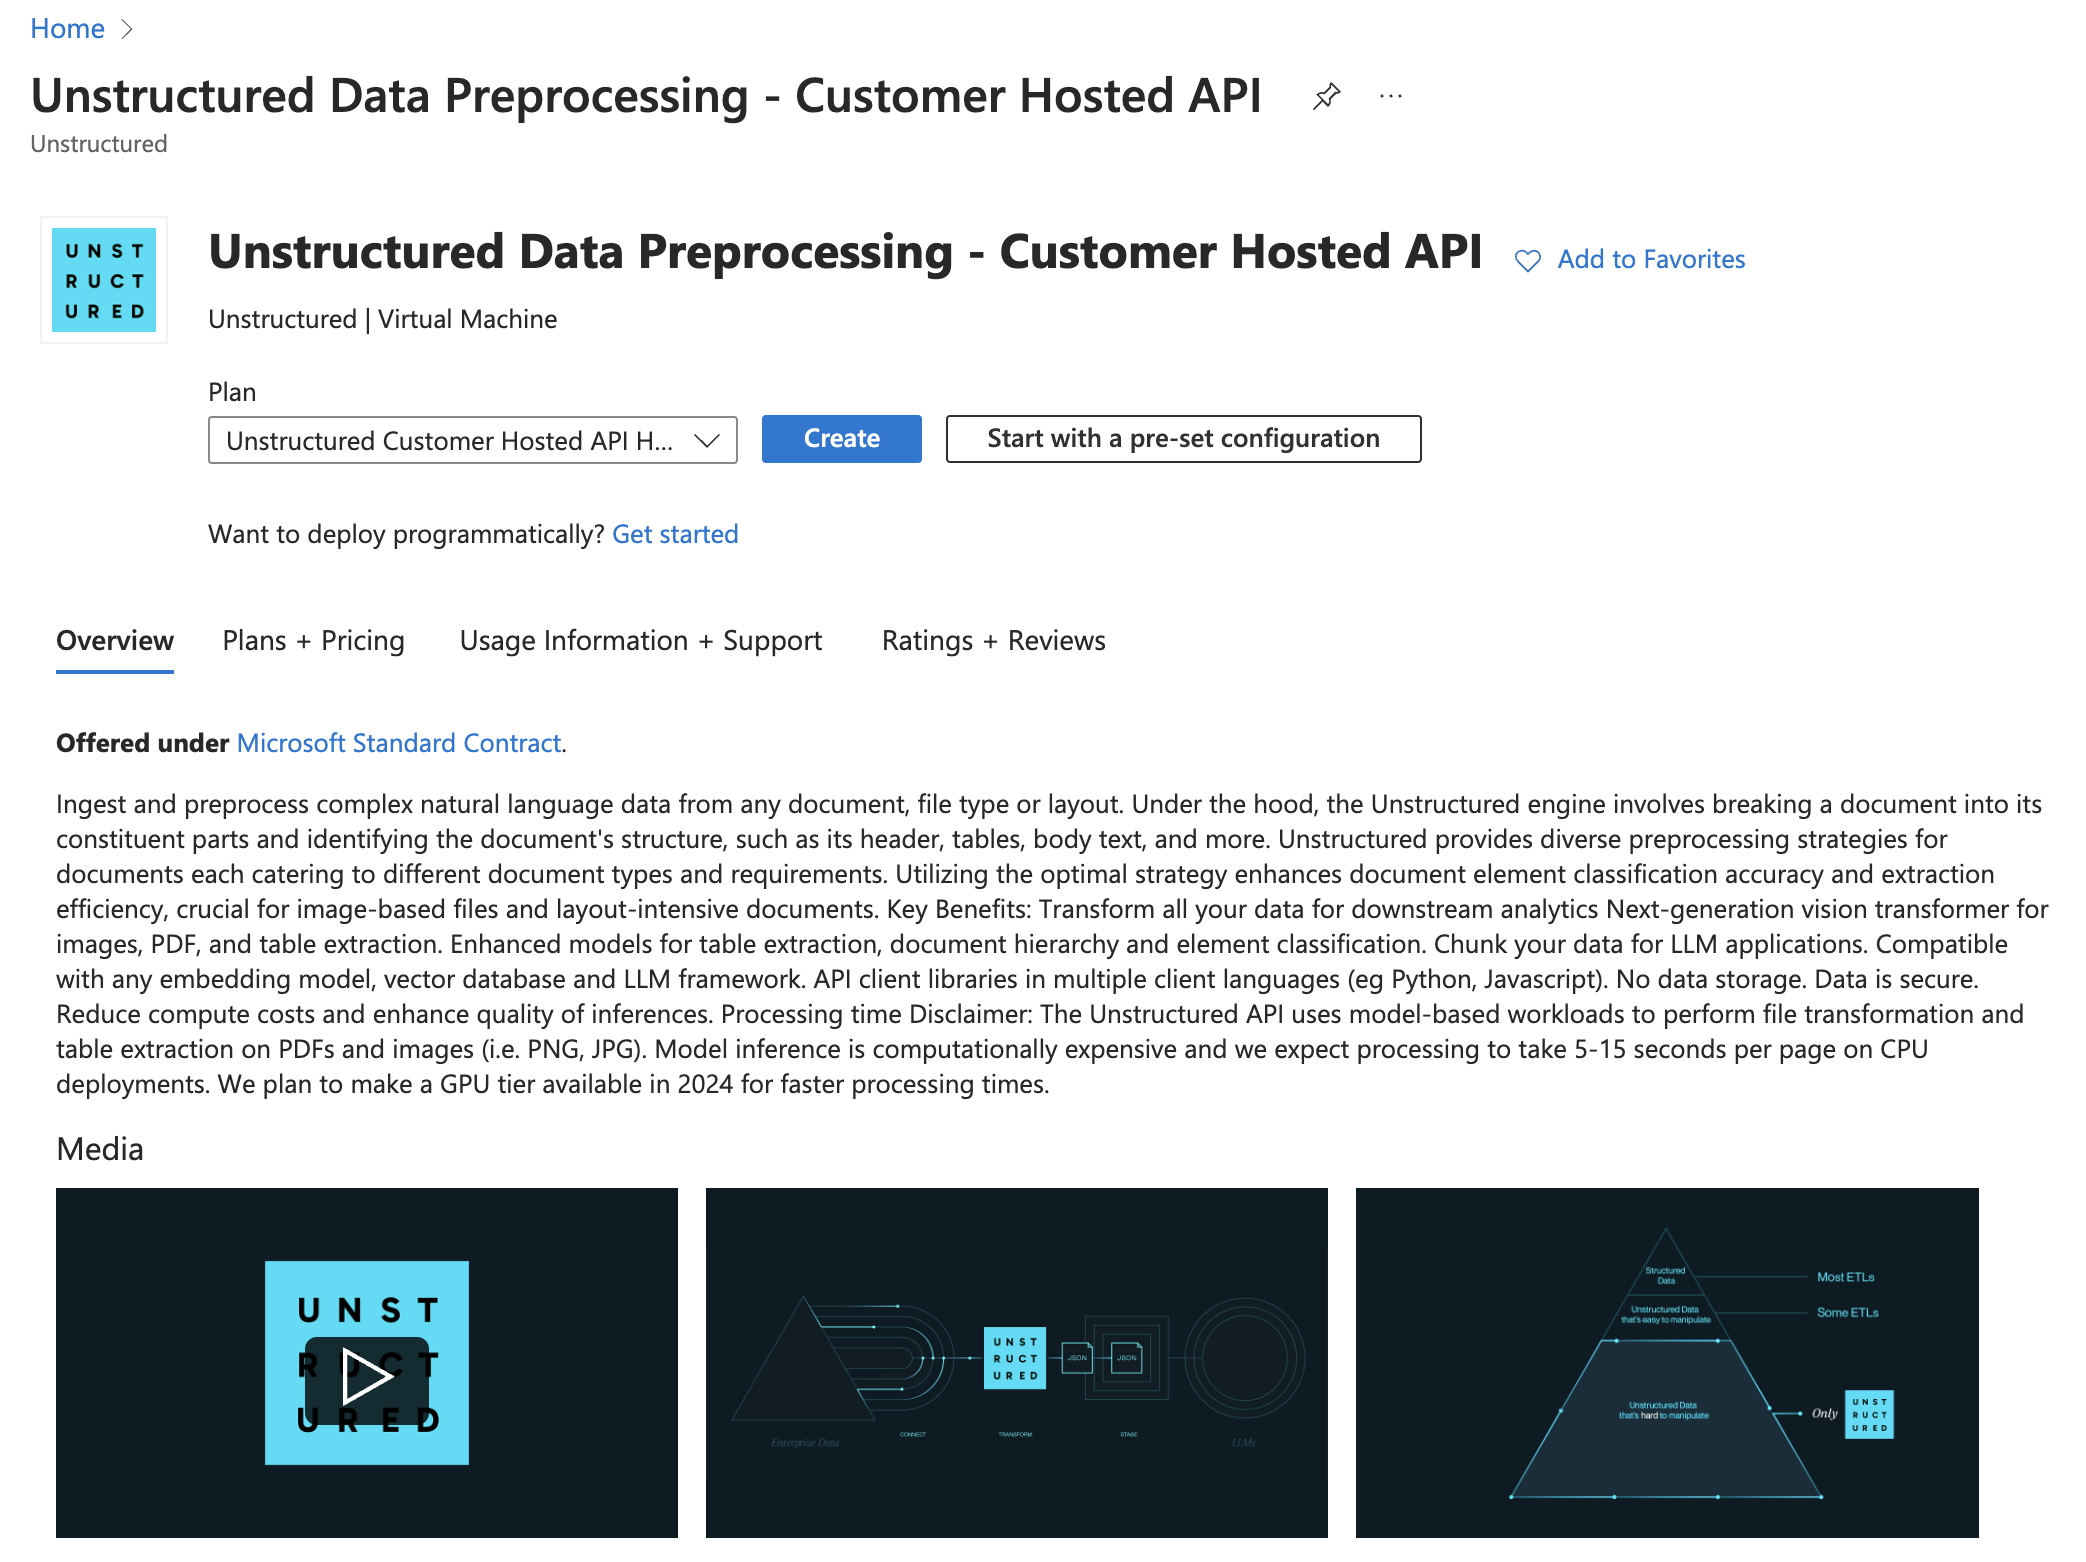
3. Click **Create**.
1. Click **Get It Now** and fill out the form.
2. Read the terms and click **Continue**.
3. Click **Create**.
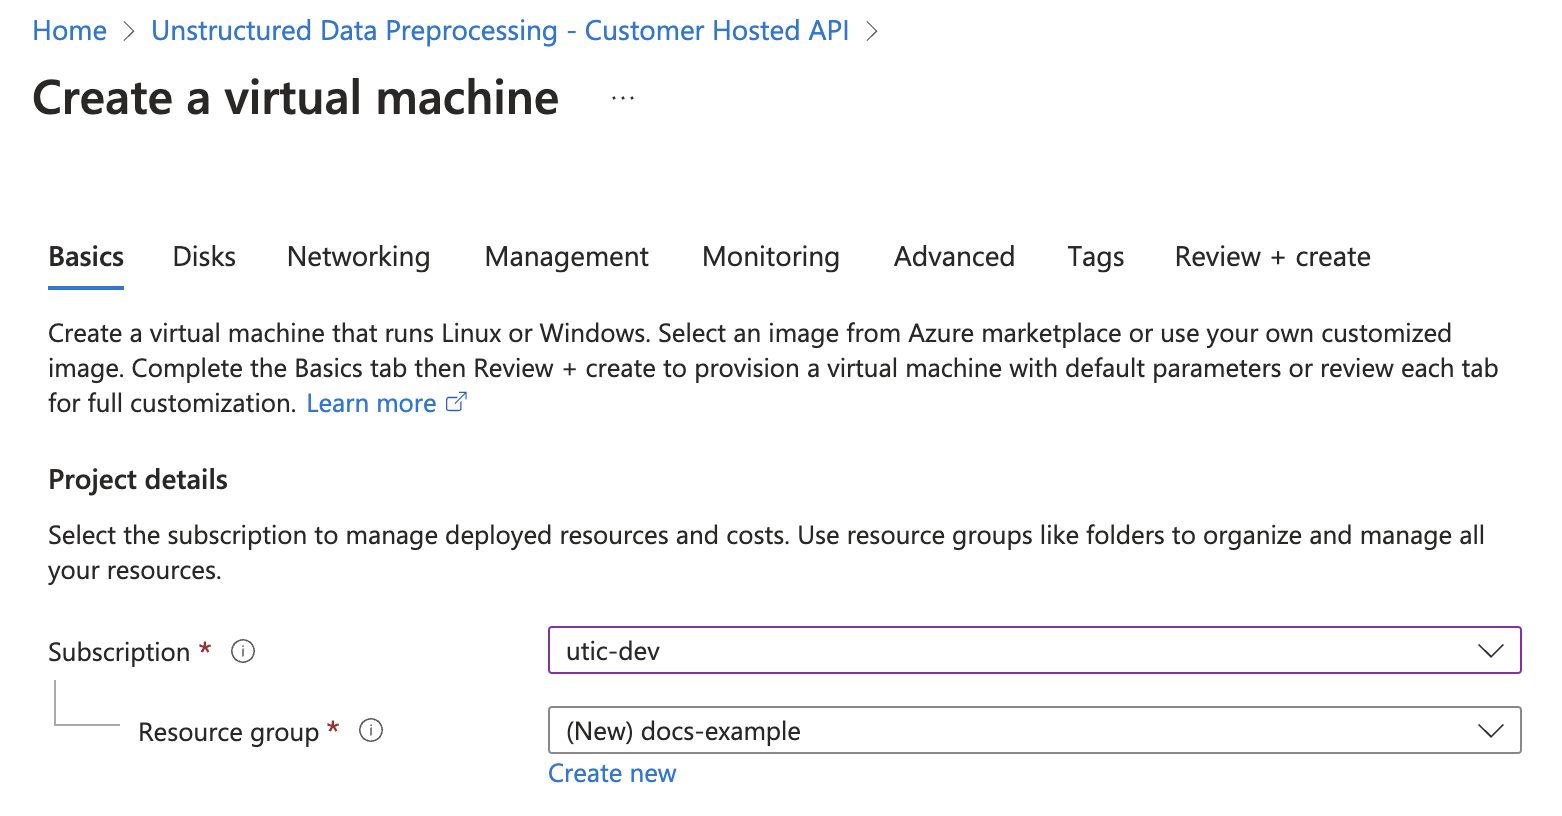
 1. On the **Create a virtual machine** page, click the **Basics** tab.
2. In the **Project details** section, select an existing **Subscription**, and select an **Resource group** from the dropdown menus, or create a new resource group by clicking **Create new**.
1. On the **Create a virtual machine** page, click the **Basics** tab.
2. In the **Project details** section, select an existing **Subscription**, and select an **Resource group** from the dropdown menus, or create a new resource group by clicking **Create new**.
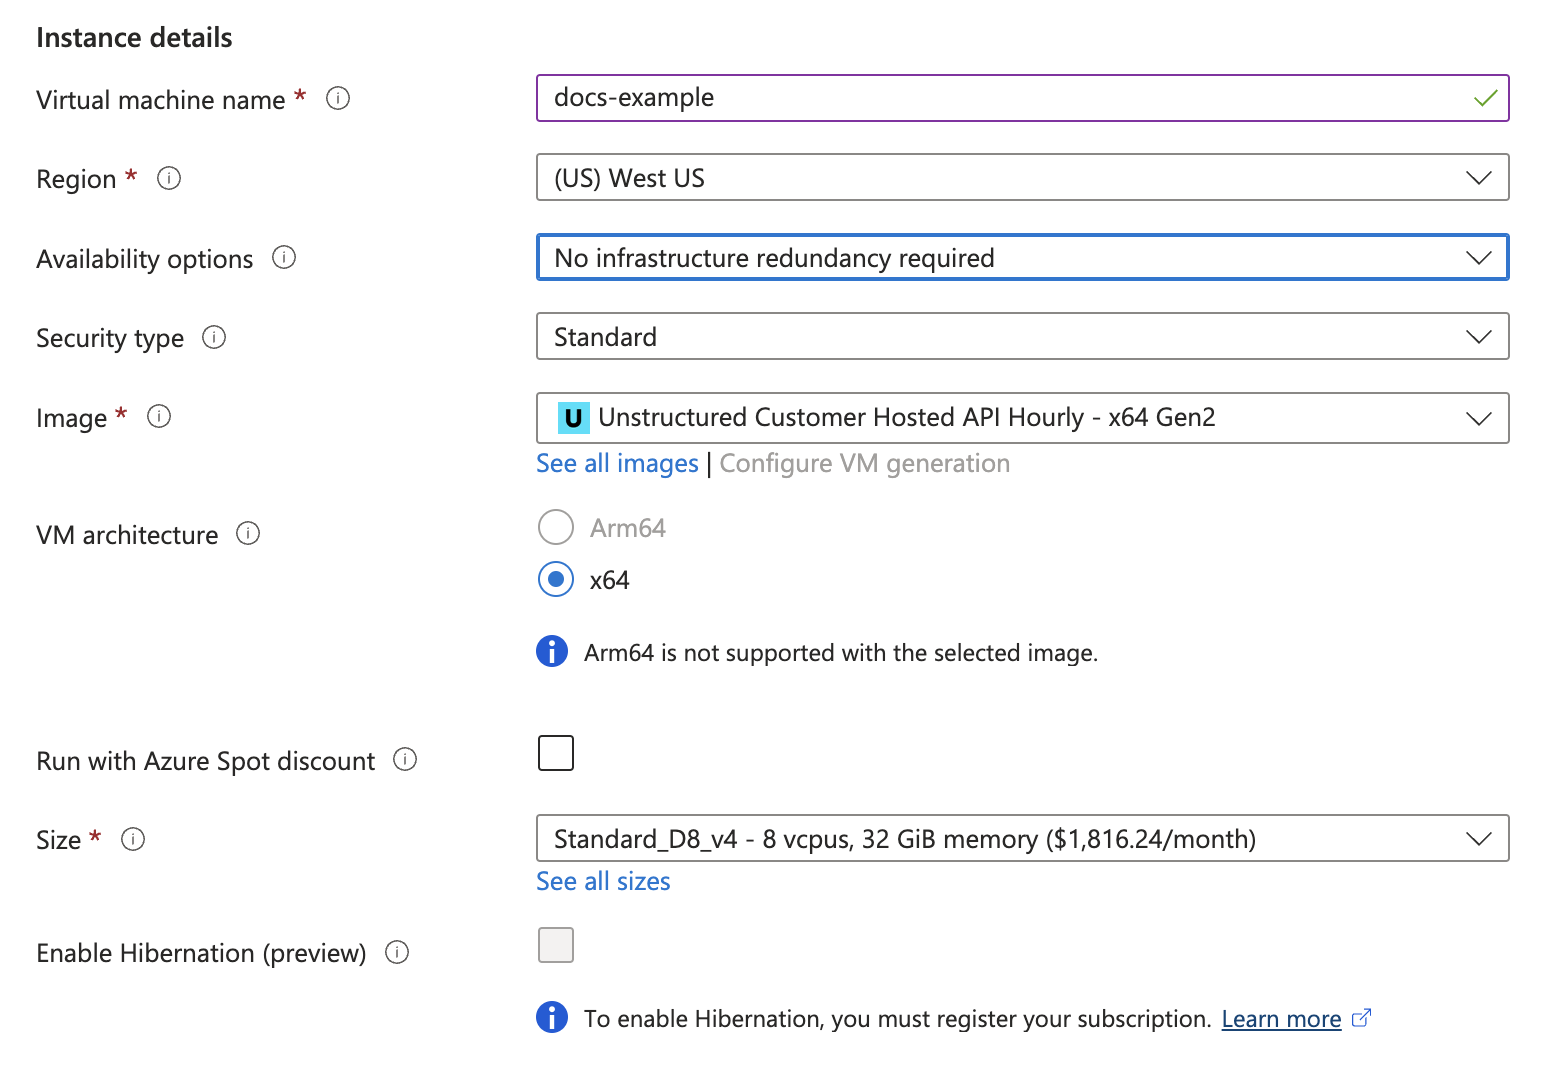
 3. In the **Instance details** section, enter a name in the **Virtual machine name** field. Note this name, as you will need it later steps.
4. Select a **Region** from the dropdown menu.
5. For **Image**, select **Unstructured Customer Hosted API Hourly - x64 Gen2** (*default*).
6. For **Size**, select a VM size from the dropdown menu, or leave the default VM size selection. To learn more, see [Azure VM comparisons](https://azure.microsoft.com/en-us/pricing/details/virtual-machines/linux/).
3. In the **Instance details** section, enter a name in the **Virtual machine name** field. Note this name, as you will need it later steps.
4. Select a **Region** from the dropdown menu.
5. For **Image**, select **Unstructured Customer Hosted API Hourly - x64 Gen2** (*default*).
6. For **Size**, select a VM size from the dropdown menu, or leave the default VM size selection. To learn more, see [Azure VM comparisons](https://azure.microsoft.com/en-us/pricing/details/virtual-machines/linux/).
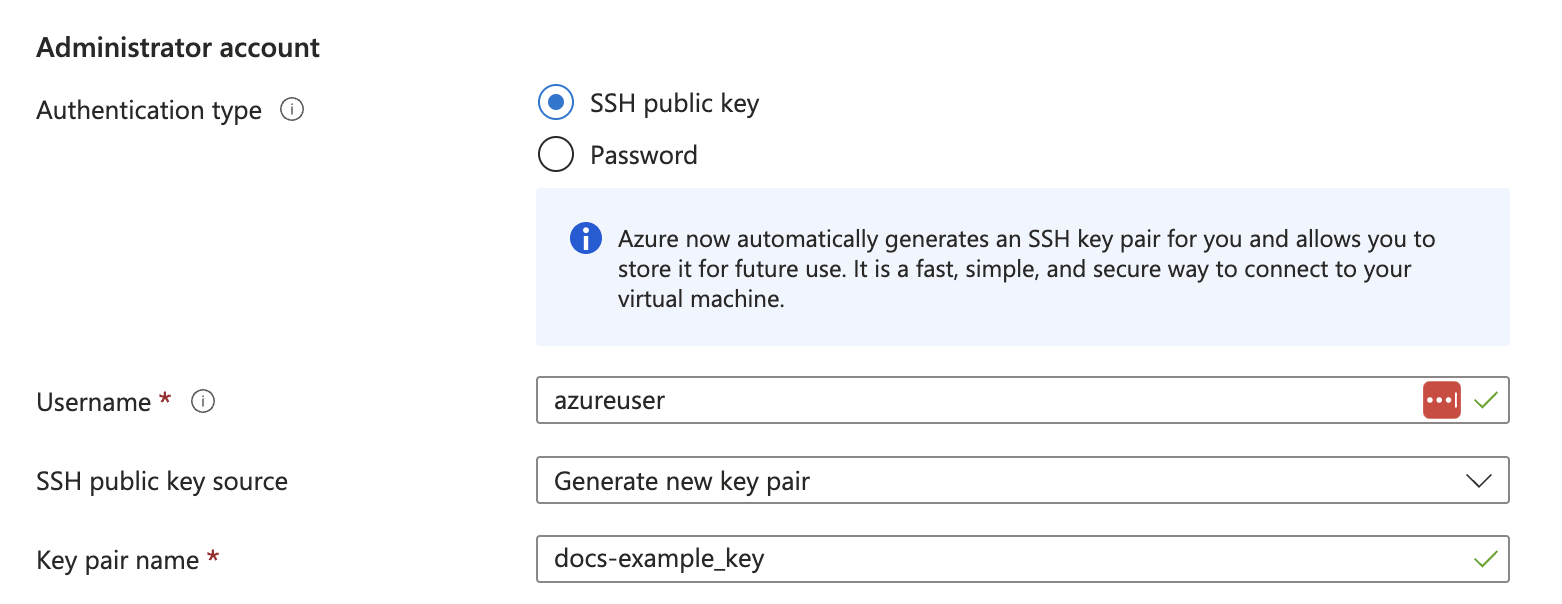
 7. In the **Administrator account** section, for **Authentication type**, select **SSH public key** or **Password**.
8. Enter the credential settings, depending on the authentication type.
7. In the **Administrator account** section, for **Authentication type**, select **SSH public key** or **Password**.
8. Enter the credential settings, depending on the authentication type.
 Do not click **Review + create** yet. You must still set up the load balancer.
1. Click the **Networking** tab.
2. In the **Networking interface** section, fill out the following fields:
* **Virtual network**: Click **Create new**, or select an existing virtual network from the dropdown menu. To learn more, see [Quickstart: Use the Azure portal to create a virtual network](https://learn.microsoft.com/en-us/azure/virtual-network/quick-create-portal).
* **Subnet**: Click **Manage subnet configuration**, or select a new or existing subnet from the dropdown menu. To learn more, see [Add, change, or delete a virtual network subnet](https://learn.microsoft.com/en-us/azure/virtual-network/virtual-network-manage-subnet?tabs=azure-portal).
* **Configure network security group**: Click **Create new**, or select an existing security group from the dropdown menu. To learn more, see [Create, change, or delete a network security group](https://learn.microsoft.com/en-us/azure/virtual-network/manage-network-security-group?tabs=network-security-group-portal).
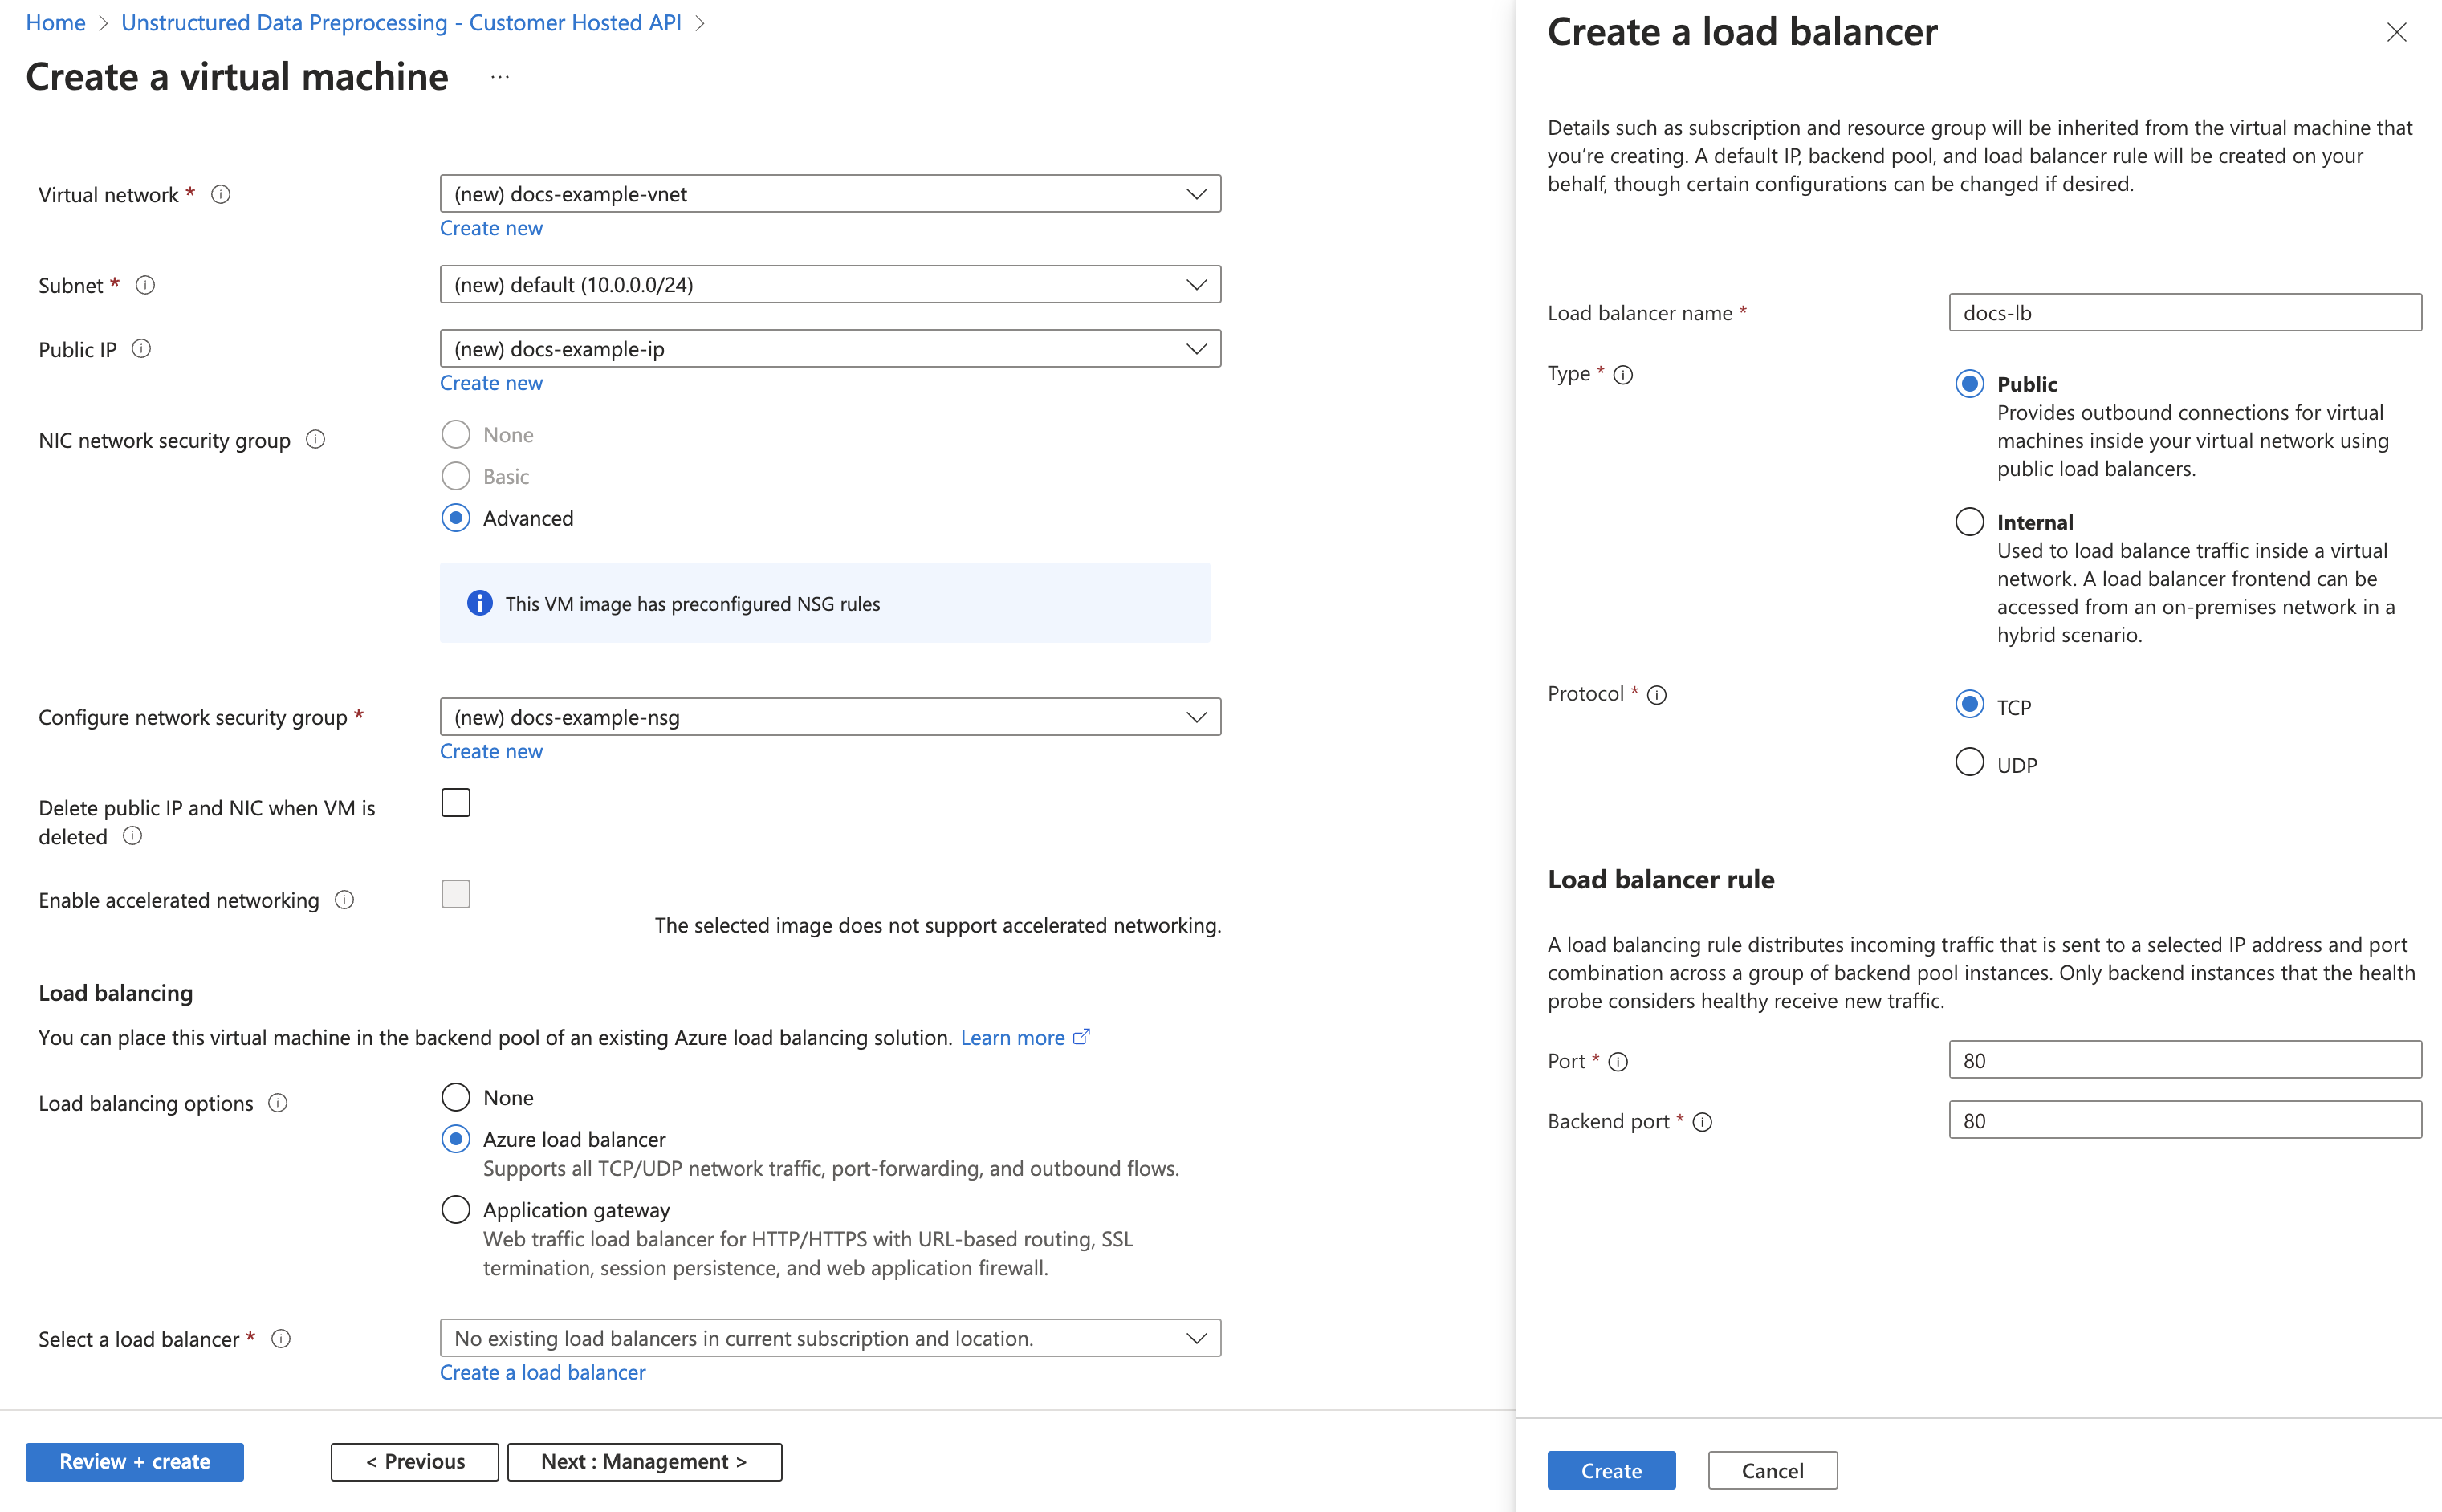
3. In the **Load balancing** section, fill out the following fields:
* **Load balancing options**: Select **Azure load balancer**.
* **Select a load balancer**: Click **Create a load balancer** and fill out the following fields in the pop-up window, or select an existing load balancer from the dropdown menu and note this name as you will need it in later steps:
* Enter a **Load balancer name**. Note this name, as you will need it in later steps.
* For **Type**, select **Public** or **Internal**.
* For **Protocol**, select **TCP** or **UDP**.
* Set both **Port** and **Backend port** to **80**.
Do not click **Review + create** yet. You must still set up the load balancer.
1. Click the **Networking** tab.
2. In the **Networking interface** section, fill out the following fields:
* **Virtual network**: Click **Create new**, or select an existing virtual network from the dropdown menu. To learn more, see [Quickstart: Use the Azure portal to create a virtual network](https://learn.microsoft.com/en-us/azure/virtual-network/quick-create-portal).
* **Subnet**: Click **Manage subnet configuration**, or select a new or existing subnet from the dropdown menu. To learn more, see [Add, change, or delete a virtual network subnet](https://learn.microsoft.com/en-us/azure/virtual-network/virtual-network-manage-subnet?tabs=azure-portal).
* **Configure network security group**: Click **Create new**, or select an existing security group from the dropdown menu. To learn more, see [Create, change, or delete a network security group](https://learn.microsoft.com/en-us/azure/virtual-network/manage-network-security-group?tabs=network-security-group-portal).
3. In the **Load balancing** section, fill out the following fields:
* **Load balancing options**: Select **Azure load balancer**.
* **Select a load balancer**: Click **Create a load balancer** and fill out the following fields in the pop-up window, or select an existing load balancer from the dropdown menu and note this name as you will need it in later steps:
* Enter a **Load balancer name**. Note this name, as you will need it in later steps.
* For **Type**, select **Public** or **Internal**.
* For **Protocol**, select **TCP** or **UDP**.
* Set both **Port** and **Backend port** to **80**.
 4. Click **Create**.
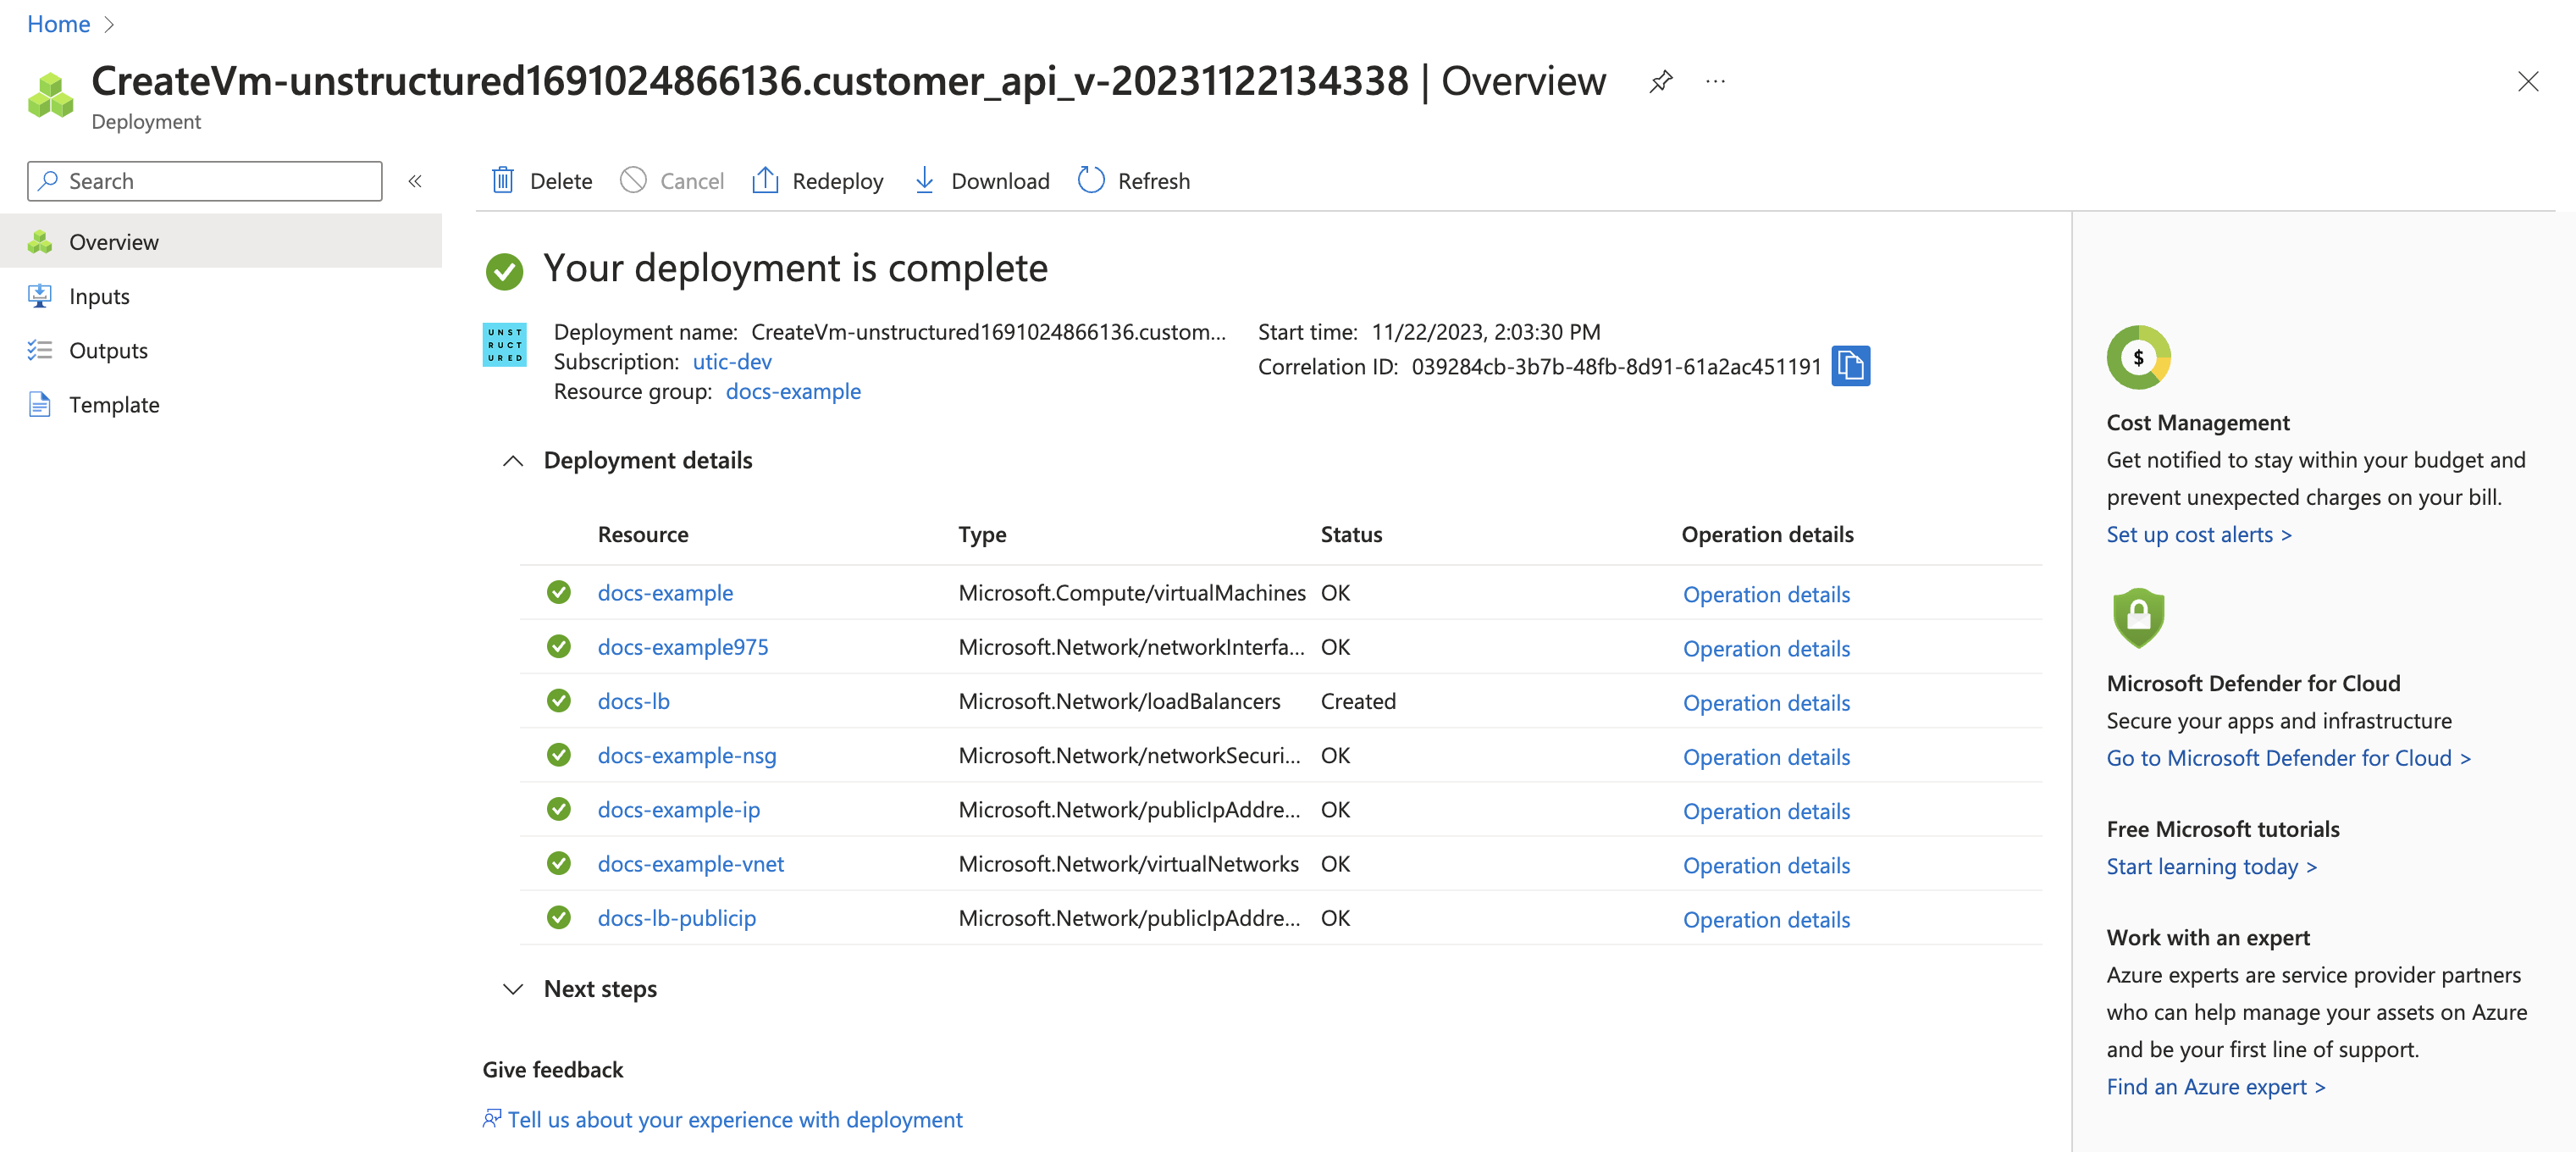
1. Click **Review + create**.
2. Wait for validation.
3. Click **Create**.
4. Click **Create**.
1. Click **Review + create**.
2. Wait for validation.
3. Click **Create**.
 1. Go to your load balancer: in the Azure portal's **Search resources, services and docs** box, enter and then select **Load balancers**.
2. Search for and open the new load balancer that you created earlier, or the existing load balancer that you chose earlier.
3. Make any necessary settings updates to your new or existing load balancer, based on the recommended configurations in the [Load balancer network settings](#load-balancer-network-settings) section, later on this page.
1. Go to your virtual machine: in the Azure portal's **Search resources, services and docs** box, enter and then select **Virtual machines**.
2. Search for and open the new virtual machine that you created earlier, using the name that you entered earlier.
3. On the **Overview** tab, under **Properties**, note the **Public IP address** for the **Load balancer**.
1. Go to your load balancer: in the Azure portal's **Search resources, services and docs** box, enter and then select **Load balancers**.
2. Search for and open the new load balancer that you created earlier, or the existing load balancer that you chose earlier.
3. Make any necessary settings updates to your new or existing load balancer, based on the recommended configurations in the [Load balancer network settings](#load-balancer-network-settings) section, later on this page.
1. Go to your virtual machine: in the Azure portal's **Search resources, services and docs** box, enter and then select **Virtual machines**.
2. Search for and open the new virtual machine that you created earlier, using the name that you entered earlier.
3. On the **Overview** tab, under **Properties**, note the **Public IP address** for the **Load balancer**.
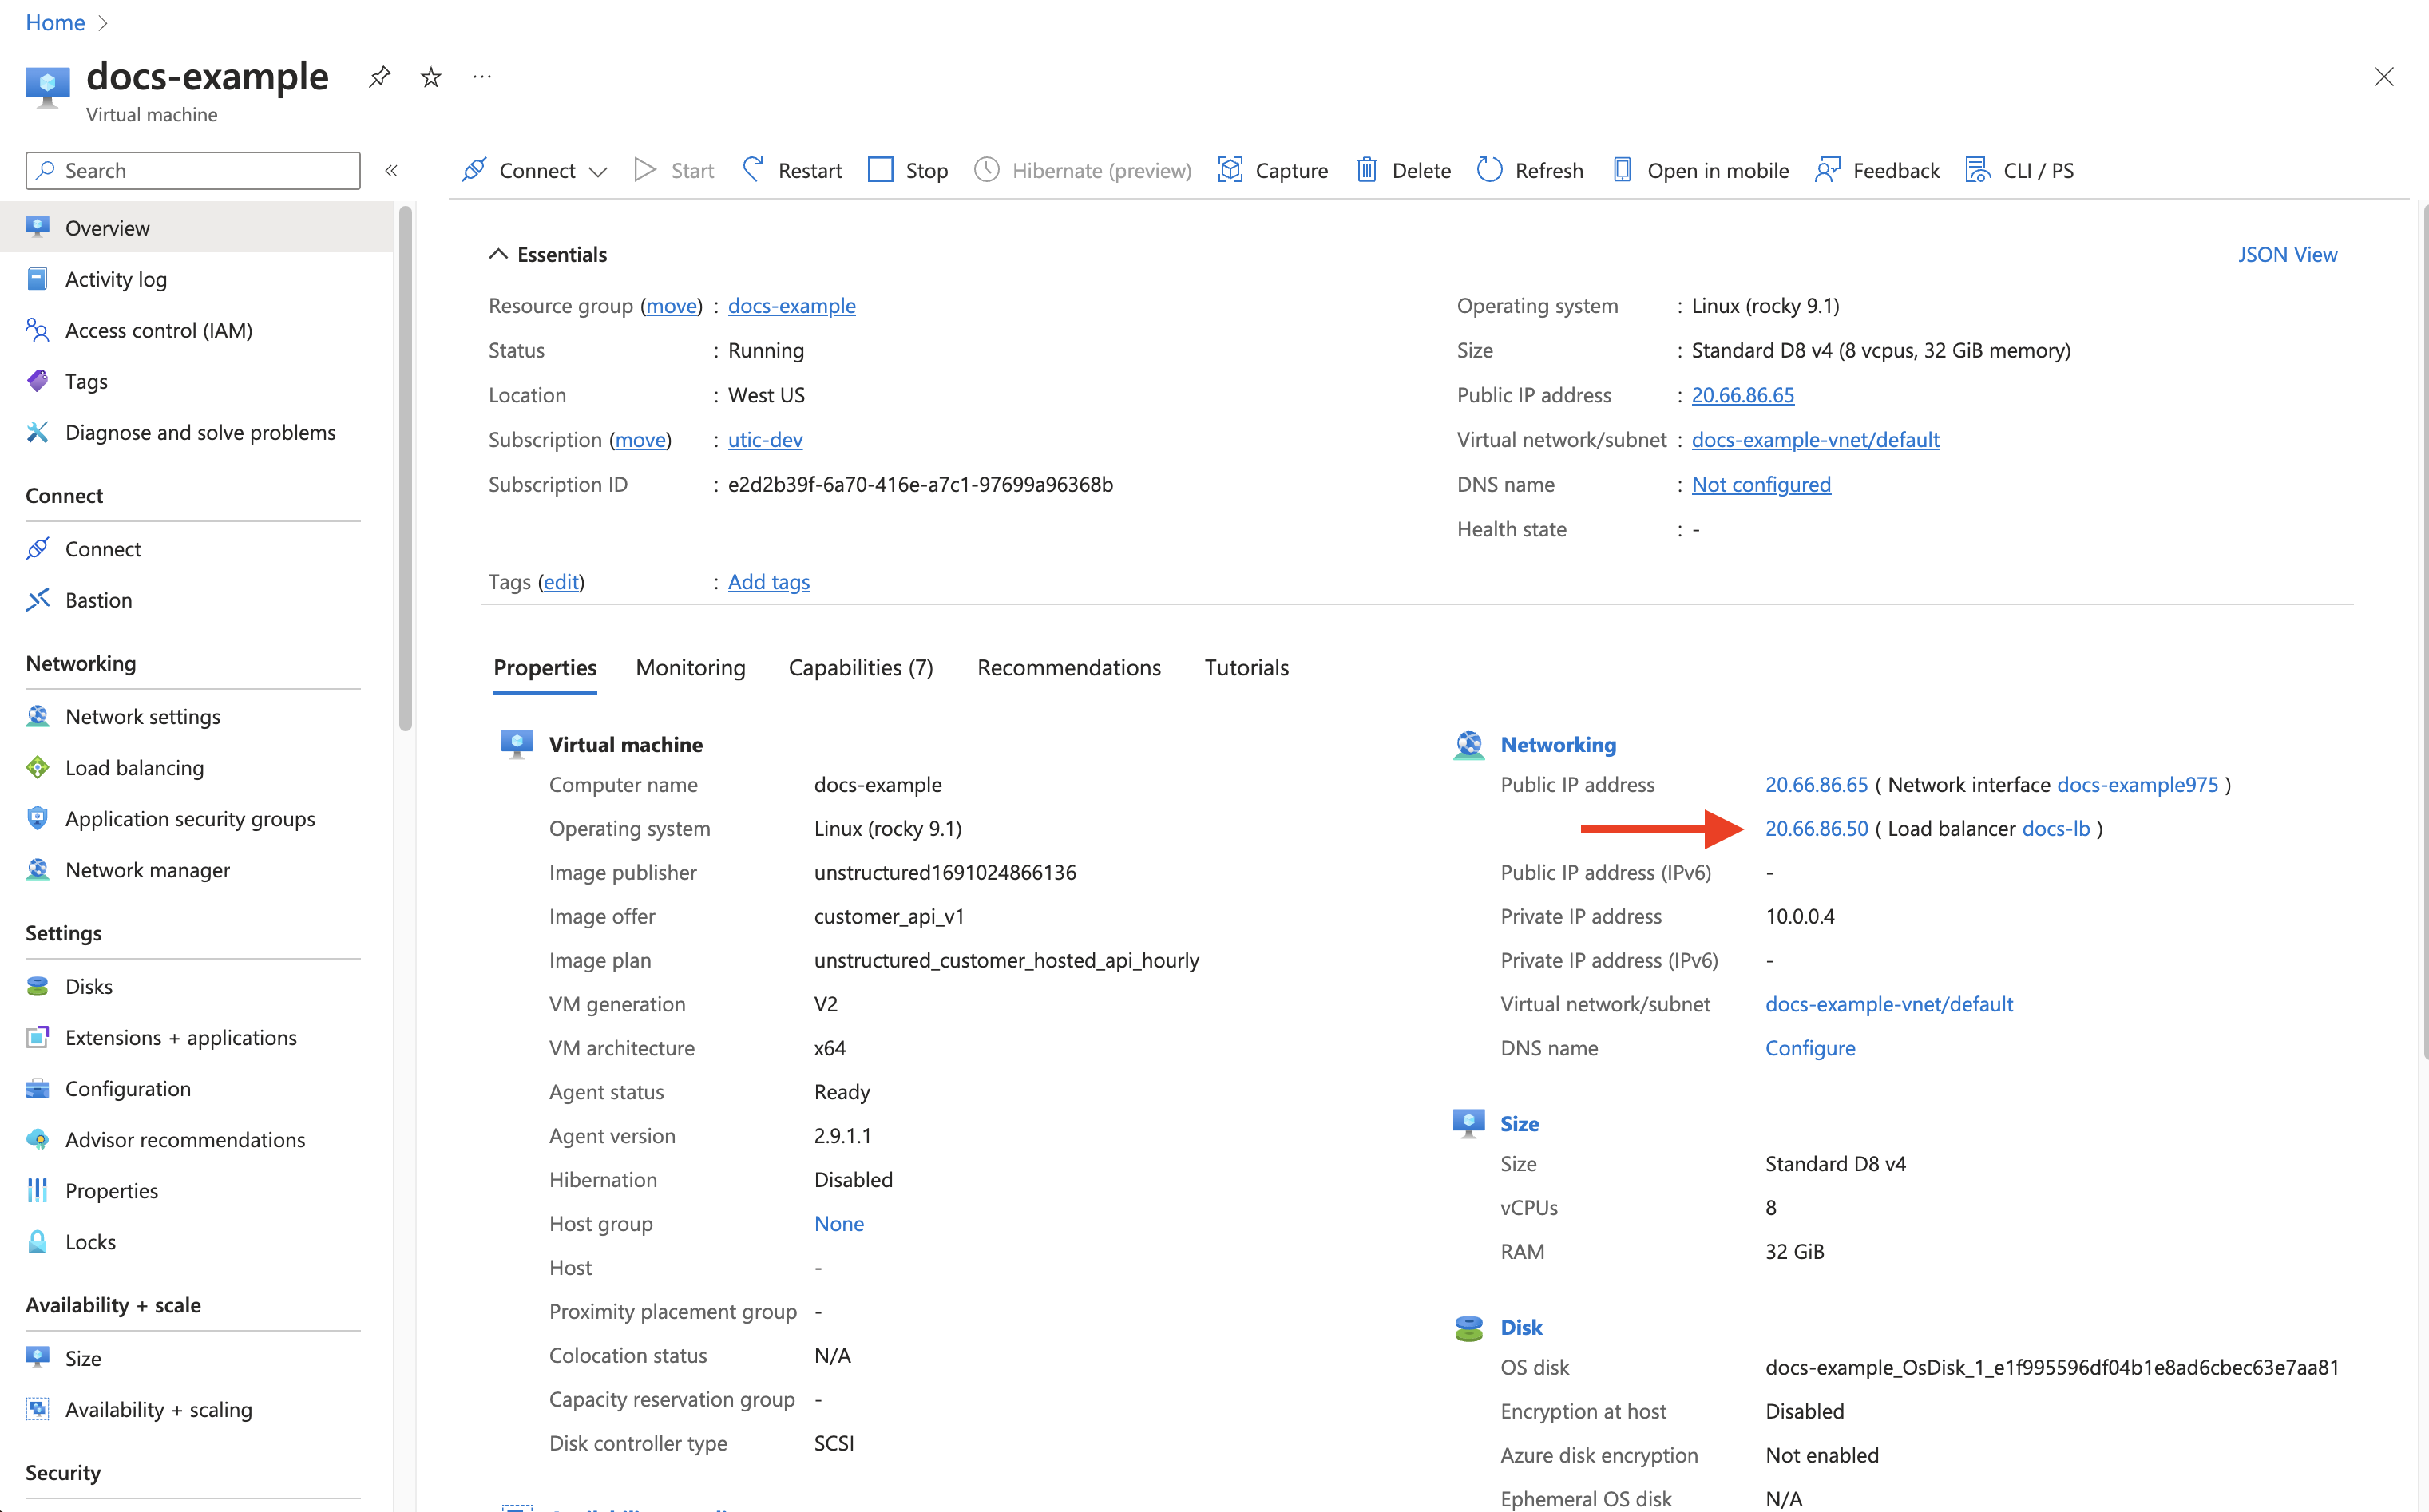 4. The deployed endpoint URL is **http\://\/general/v0/general**. Note this endpoint URL, as you will need it later to call the Unstructured API.
Note the API environment variables in the [API environment variables](#api-environment-variables) section, later on this page. If you need to set any of these in the Docker container on the virtual machine, do the following:
1. If the virtual machine is not already running from earlier, click the **Start** icon.
2. After the virtual machine starts, click the **Connect** icon, and then click **Connect** from the drop-down list.
3. Follow the on-screen directions for one of the available options to connect to the virtual machine and display a connected terminal.
4. Stop the running container in the virtual machine, so that you can restart it later with the environment variables set: In the connected terminal, run the following command: `sudo docker container ls`.
5. Note the `CONTAINER ID` value for the running container.
6. Run the following command, replacing `` with the `CONTAINER ID` value:
```bash theme={null}
sudo docker container rm --force
```
7. Now run the container again, setting the environment variables at the same time: Run the following command: `sudo docker image ls`.
8. Note the `REPOSITORY` and `TAG` value for the Docker image.
9. Run the following command, replacing `` and `` with the `REPOSITORY` and `TAG` values for the Docker image, and replacing
`=`, `=` and so on with the environment variable name and value pairs:
```bash theme={null}
sudo docker run -d --restart unless-stopped \
-p 80:5000 \
-e = -e = -e = \
:
```
10. Verify that the environment variables were set correctly: Run the following command:
```bash theme={null}
sudo docker container ls
```
11. Note the `CONTAINER ID` value for the running container.
12. Run the following command, replacing `` with the `CONTAINER ID` value:
```bash theme={null}
sudo docker exec bash -c 'printenv'
```
14. The environment variables should be in the list that appears.
To help manage your overall costs, you should click the **Stop** icon whenever you are not using this virtual machine to call the Unstructured API.
You can now use the running virtual machine to call the Unstructured API. For example, run one of the following, setting the following environment variables to make your code more portable:
* Set `UNSTRUCTURED_API_URL` to `http://`, followed by your load balancer's public IP address, followed by `/general/v0/general`.
* Set `LOCAL_FILE_INPUT_DIR` to the path on your local machine to the files for the Unstructured API to process. If you do not have any input files available, you can download any of the ones from the [example-docs](https://github.com/Unstructured-IO/unstructured-ingest/tree/main/example-docs) folder in GitHub.
* Set `LOCAL_FILE_OUTPUT_DIR` to the path on your local machine for Unstructured API to send the processed output in JSON format.
You must first [install the Unstructured Ingest CLI](/open-source/ingestion/overview#unstructured-ingest-cli).
Because you are calling a private API and therefore do not need an Unstructured API key, you can omit the command-line option `--api-key` Or, for better code portability, it is recommended that you first set the environment variable `UNSTRUCTURED_API_KEY` to an empty string and then include the command-line option `--api-key`.
```bash CLI theme={null}
unstructured-ingest \
local \
--input-path $LOCAL_FILE_INPUT_DIR \
--output-dir $LOCAL_FILE_OUTPUT_DIR \
--partition-by-api \
--api-key $UNSTRUCTURED_API_KEY \
--partition-endpoint $UNSTRUCTURED_API_URL \
--strategy hi_res \
--additional-partition-args="{\"split_pdf_page\":\"true\", \"split_pdf_allow_failed\":\"true\", \"split_pdf_concurrency_level\": 15}"
```
You must first [install the Unstructured Ingest Python library](/open-source/ingestion/python-ingest).
Because you are calling a private API and therefore do not need an Unstructured API key, you can omit the parameter `api_key`. Or, for better code portability, it is recommended that you first set the environment variable `UNSTRUCTURED_API_KEY` to an empty string and then include the parameter `api_key`.
```python Python Ingest theme={null}
import os
from unstructured_ingest.pipeline.pipeline import Pipeline
from unstructured_ingest.interfaces import ProcessorConfig
from unstructured_ingest.processes.connectors.local import (
LocalIndexerConfig,
LocalDownloaderConfig,
LocalConnectionConfig,
LocalUploaderConfig
)
from unstructured_ingest.processes.partitioner import PartitionerConfig
if __name__ == "__main__":
Pipeline.from_configs(
context=ProcessorConfig(),
indexer_config=LocalIndexerConfig(input_path=os.getenv("LOCAL_FILE_INPUT_DIR")),
downloader_config=LocalDownloaderConfig(),
source_connection_config=LocalConnectionConfig(),
partitioner_config=PartitionerConfig(
partition_by_api=True,
api_key=os.getenv("UNSTRUCTURED_API_KEY"),
partition_endpoint=os.getenv("UNSTRUCTURED_API_URL"),
strategy="hi_res",
additional_partition_args={
"split_pdf_page": True,
"split_pdf_allow_failed": True,
"split_pdf_concurrency_level": 15
}
),
uploader_config=LocalUploaderConfig(output_dir=os.getenv("LOCAL_FILE_OUTPUT_DIR"))
).run()
```
To help manage your overall costs, you should stop running the associated virtual machine whenever you are not using it to call the Unstructured API.
## Load balancer network settings
Unstructured recommends the following load balancer settings, which you should set on your deployment's load balancer soon after you finalize and deploy it.
On the load balancer's **Overview** tab in the Azure portal:
* **SKU**: **Standard**
On the load balancer's **Settings** tab in the Azure portal:
* **Frontend IP configuration**: Private IP
* **Backend pools**: VMSS
* **Health probes**:
* **Protocol**: **HTTP**, or **HTTPS** (this requires setting up a reverse proxy on the VMSS set to do TLS termination)
* **Port**: `80` or `443` (this can be any port that the backend VMs are listening on)
* **Path**: `/healthcheck`
* **Interval (seconds)**: `5`
* **Load balancing rules**:
* **Protocol**: **TCP**
* **Port**: `443` for HTTPS, or `80` for HTTP
* **Backend port**: `443` for HTTPS, or `80` for HTTP
* **Idle timeout (minutes)**: `60`
* **Enable TCP Reset** box: Checked
* **Inbound NAT rules**:
* **Frontend Port**: `443` for HTTPS, or `80` for HTTP
* **Backend port**: `443` for HTTPS, or `80` for HTTP
* **Protocol**: **TCP**
* **Enable TCP Reset** box: Checked
* **Idle timeout (minutes)**: `60`
## API environment variables
Unstructured supports the following environment variables, which you can set in the Docker image on the virtual machine, as needed:
* `ALLOW_ORIGINS`: CORS-allowed origins.
* `UNSTRUCTURED_ALLOWED_MIMETYPE`: The list of allowed MIME types, if you want to limit the file types that can be processed.
* `UNSTRUCTURED_API_KEY`: The default Unstructured API key to use.
* `UNSTRUCTURED_MEMORY_FREE_MINIMUM_MB`: The minimum amount of free memory in MB to allow for processing a file. If this memory is too low, the server will return a `503` error.
* `UNSTRUCTURED_PDF_HI_RES_MAX_PAGES`: The maximum number of pages in a PDF file that the Unstructured API will not reject, if the `hi_res` strategy is used. The default is `300`.
* `UNSTRUCTURED_REDIRECT_ROOT_URL`: If this is set, redirect a `GET` request to the Unstructured API to use this URL instead.
4. The deployed endpoint URL is **http\://\/general/v0/general**. Note this endpoint URL, as you will need it later to call the Unstructured API.
Note the API environment variables in the [API environment variables](#api-environment-variables) section, later on this page. If you need to set any of these in the Docker container on the virtual machine, do the following:
1. If the virtual machine is not already running from earlier, click the **Start** icon.
2. After the virtual machine starts, click the **Connect** icon, and then click **Connect** from the drop-down list.
3. Follow the on-screen directions for one of the available options to connect to the virtual machine and display a connected terminal.
4. Stop the running container in the virtual machine, so that you can restart it later with the environment variables set: In the connected terminal, run the following command: `sudo docker container ls`.
5. Note the `CONTAINER ID` value for the running container.
6. Run the following command, replacing `` with the `CONTAINER ID` value:
```bash theme={null}
sudo docker container rm --force
```
7. Now run the container again, setting the environment variables at the same time: Run the following command: `sudo docker image ls`.
8. Note the `REPOSITORY` and `TAG` value for the Docker image.
9. Run the following command, replacing `` and `` with the `REPOSITORY` and `TAG` values for the Docker image, and replacing
`=`, `=` and so on with the environment variable name and value pairs:
```bash theme={null}
sudo docker run -d --restart unless-stopped \
-p 80:5000 \
-e = -e = -e = \
:
```
10. Verify that the environment variables were set correctly: Run the following command:
```bash theme={null}
sudo docker container ls
```
11. Note the `CONTAINER ID` value for the running container.
12. Run the following command, replacing `` with the `CONTAINER ID` value:
```bash theme={null}
sudo docker exec bash -c 'printenv'
```
14. The environment variables should be in the list that appears.
To help manage your overall costs, you should click the **Stop** icon whenever you are not using this virtual machine to call the Unstructured API.
You can now use the running virtual machine to call the Unstructured API. For example, run one of the following, setting the following environment variables to make your code more portable:
* Set `UNSTRUCTURED_API_URL` to `http://`, followed by your load balancer's public IP address, followed by `/general/v0/general`.
* Set `LOCAL_FILE_INPUT_DIR` to the path on your local machine to the files for the Unstructured API to process. If you do not have any input files available, you can download any of the ones from the [example-docs](https://github.com/Unstructured-IO/unstructured-ingest/tree/main/example-docs) folder in GitHub.
* Set `LOCAL_FILE_OUTPUT_DIR` to the path on your local machine for Unstructured API to send the processed output in JSON format.
You must first [install the Unstructured Ingest CLI](/open-source/ingestion/overview#unstructured-ingest-cli).
Because you are calling a private API and therefore do not need an Unstructured API key, you can omit the command-line option `--api-key` Or, for better code portability, it is recommended that you first set the environment variable `UNSTRUCTURED_API_KEY` to an empty string and then include the command-line option `--api-key`.
```bash CLI theme={null}
unstructured-ingest \
local \
--input-path $LOCAL_FILE_INPUT_DIR \
--output-dir $LOCAL_FILE_OUTPUT_DIR \
--partition-by-api \
--api-key $UNSTRUCTURED_API_KEY \
--partition-endpoint $UNSTRUCTURED_API_URL \
--strategy hi_res \
--additional-partition-args="{\"split_pdf_page\":\"true\", \"split_pdf_allow_failed\":\"true\", \"split_pdf_concurrency_level\": 15}"
```
You must first [install the Unstructured Ingest Python library](/open-source/ingestion/python-ingest).
Because you are calling a private API and therefore do not need an Unstructured API key, you can omit the parameter `api_key`. Or, for better code portability, it is recommended that you first set the environment variable `UNSTRUCTURED_API_KEY` to an empty string and then include the parameter `api_key`.
```python Python Ingest theme={null}
import os
from unstructured_ingest.pipeline.pipeline import Pipeline
from unstructured_ingest.interfaces import ProcessorConfig
from unstructured_ingest.processes.connectors.local import (
LocalIndexerConfig,
LocalDownloaderConfig,
LocalConnectionConfig,
LocalUploaderConfig
)
from unstructured_ingest.processes.partitioner import PartitionerConfig
if __name__ == "__main__":
Pipeline.from_configs(
context=ProcessorConfig(),
indexer_config=LocalIndexerConfig(input_path=os.getenv("LOCAL_FILE_INPUT_DIR")),
downloader_config=LocalDownloaderConfig(),
source_connection_config=LocalConnectionConfig(),
partitioner_config=PartitionerConfig(
partition_by_api=True,
api_key=os.getenv("UNSTRUCTURED_API_KEY"),
partition_endpoint=os.getenv("UNSTRUCTURED_API_URL"),
strategy="hi_res",
additional_partition_args={
"split_pdf_page": True,
"split_pdf_allow_failed": True,
"split_pdf_concurrency_level": 15
}
),
uploader_config=LocalUploaderConfig(output_dir=os.getenv("LOCAL_FILE_OUTPUT_DIR"))
).run()
```
To help manage your overall costs, you should stop running the associated virtual machine whenever you are not using it to call the Unstructured API.
## Load balancer network settings
Unstructured recommends the following load balancer settings, which you should set on your deployment's load balancer soon after you finalize and deploy it.
On the load balancer's **Overview** tab in the Azure portal:
* **SKU**: **Standard**
On the load balancer's **Settings** tab in the Azure portal:
* **Frontend IP configuration**: Private IP
* **Backend pools**: VMSS
* **Health probes**:
* **Protocol**: **HTTP**, or **HTTPS** (this requires setting up a reverse proxy on the VMSS set to do TLS termination)
* **Port**: `80` or `443` (this can be any port that the backend VMs are listening on)
* **Path**: `/healthcheck`
* **Interval (seconds)**: `5`
* **Load balancing rules**:
* **Protocol**: **TCP**
* **Port**: `443` for HTTPS, or `80` for HTTP
* **Backend port**: `443` for HTTPS, or `80` for HTTP
* **Idle timeout (minutes)**: `60`
* **Enable TCP Reset** box: Checked
* **Inbound NAT rules**:
* **Frontend Port**: `443` for HTTPS, or `80` for HTTP
* **Backend port**: `443` for HTTPS, or `80` for HTTP
* **Protocol**: **TCP**
* **Enable TCP Reset** box: Checked
* **Idle timeout (minutes)**: `60`
## API environment variables
Unstructured supports the following environment variables, which you can set in the Docker image on the virtual machine, as needed:
* `ALLOW_ORIGINS`: CORS-allowed origins.
* `UNSTRUCTURED_ALLOWED_MIMETYPE`: The list of allowed MIME types, if you want to limit the file types that can be processed.
* `UNSTRUCTURED_API_KEY`: The default Unstructured API key to use.
* `UNSTRUCTURED_MEMORY_FREE_MINIMUM_MB`: The minimum amount of free memory in MB to allow for processing a file. If this memory is too low, the server will return a `503` error.
* `UNSTRUCTURED_PDF_HI_RES_MAX_PAGES`: The maximum number of pages in a PDF file that the Unstructured API will not reject, if the `hi_res` strategy is used. The default is `300`.
* `UNSTRUCTURED_REDIRECT_ROOT_URL`: If this is set, redirect a `GET` request to the Unstructured API to use this URL instead.