1
Log in to the Azure Portal
Go to https://portal.azure.com.
2
Access the Azure Marketplace
Go to the Unstructured Data Preprocessing - Customer Hosted API offering in the Azure Marketplace.
3
Start the deployment process
- Click Get It Now and fill out the form.
- Read the terms and click Continue.
-
Click Create.
4
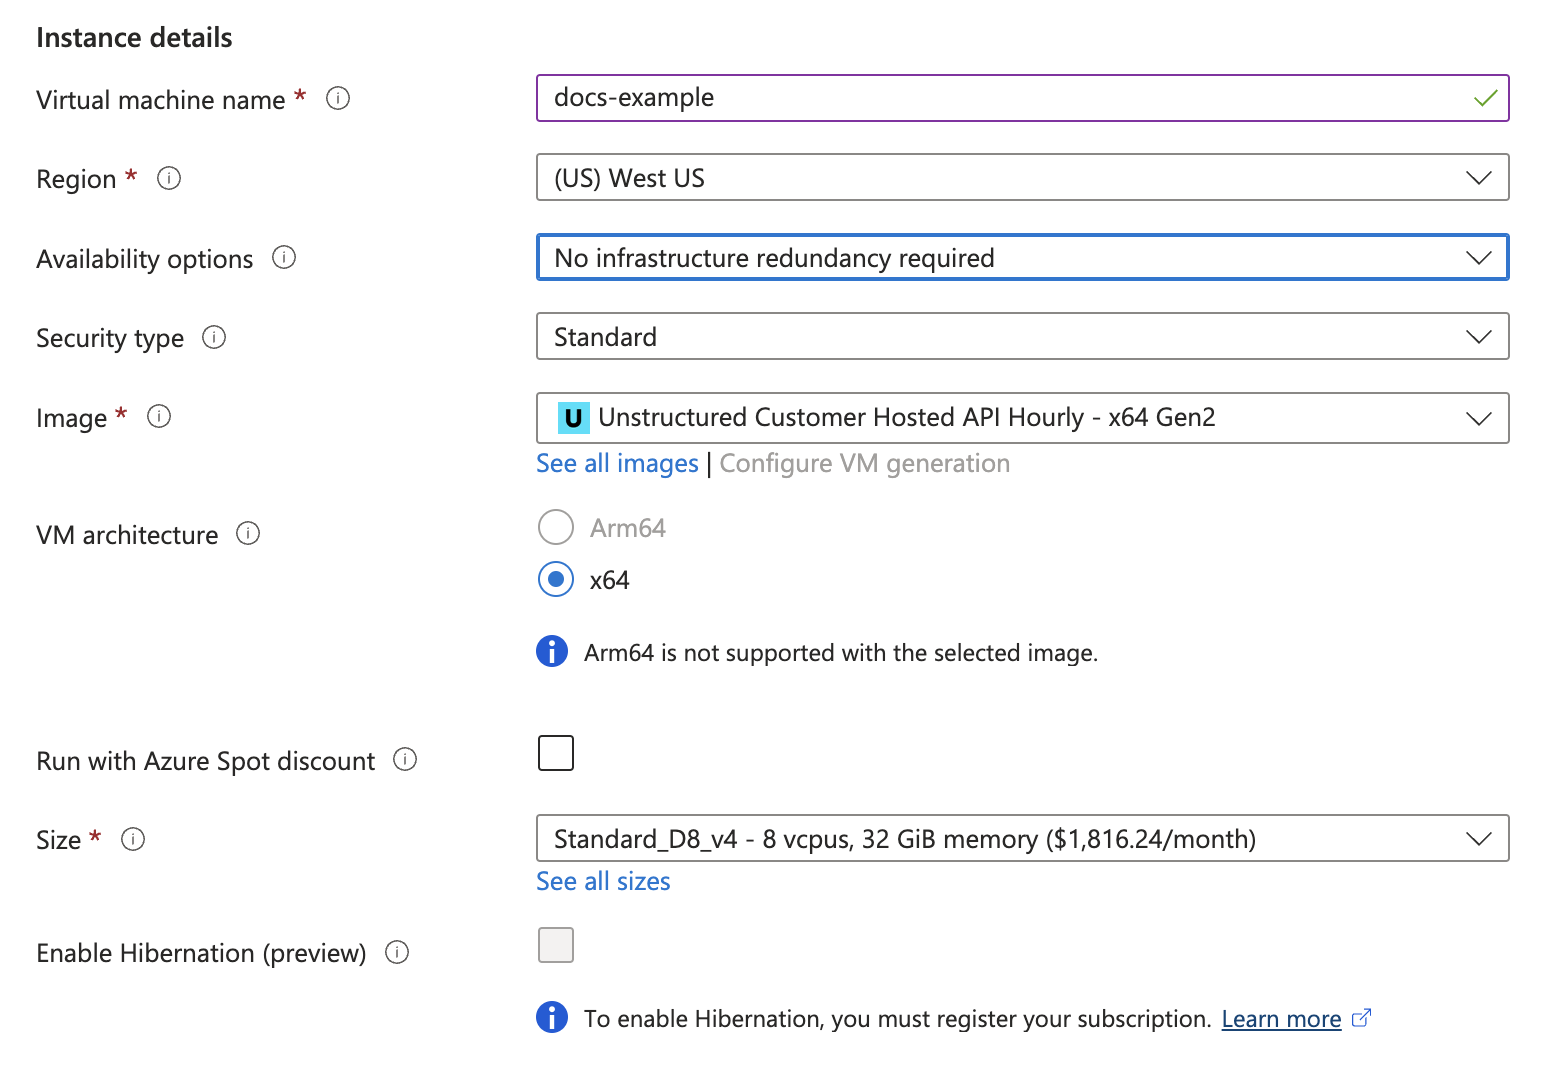
Configure the deployment options
- On the Create a virtual machine page, click the Basics tab.
-
In the Project details section, select an existing Subscription, and select an Resource group from the dropdown menus, or create a new resource group by clicking Create new.
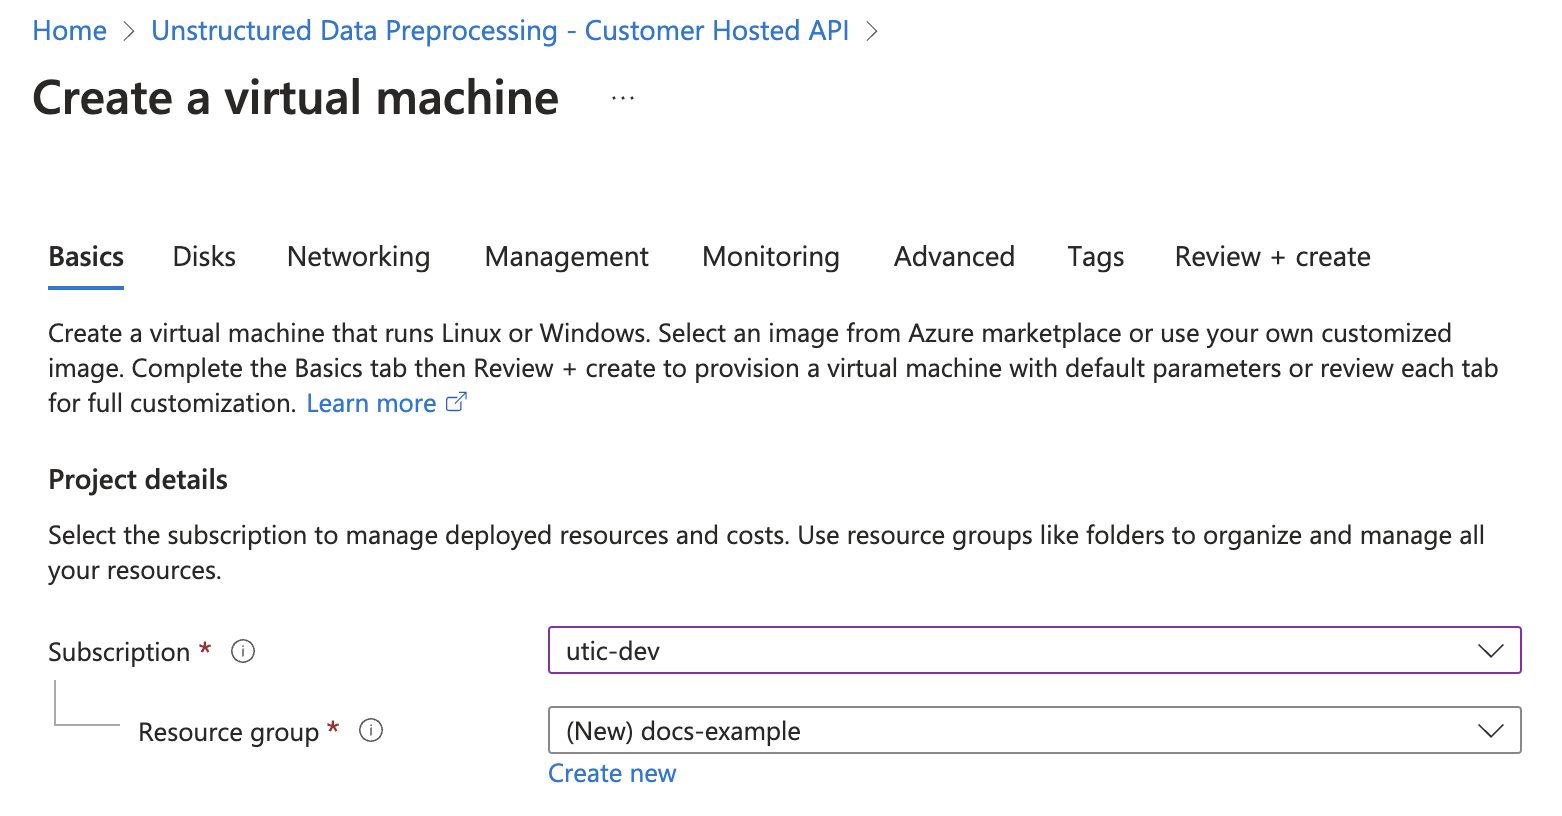
- In the Instance details section, enter a name in the Virtual machine name field. Note this name, as you will need it later steps.
- Select a Region from the dropdown menu.
- For Image, select Unstructured Customer Hosted API Hourly - x64 Gen2 (default).
-
For Size, select a VM size from the dropdown menu, or leave the default VM size selection. To learn more, see Azure VM comparisons.
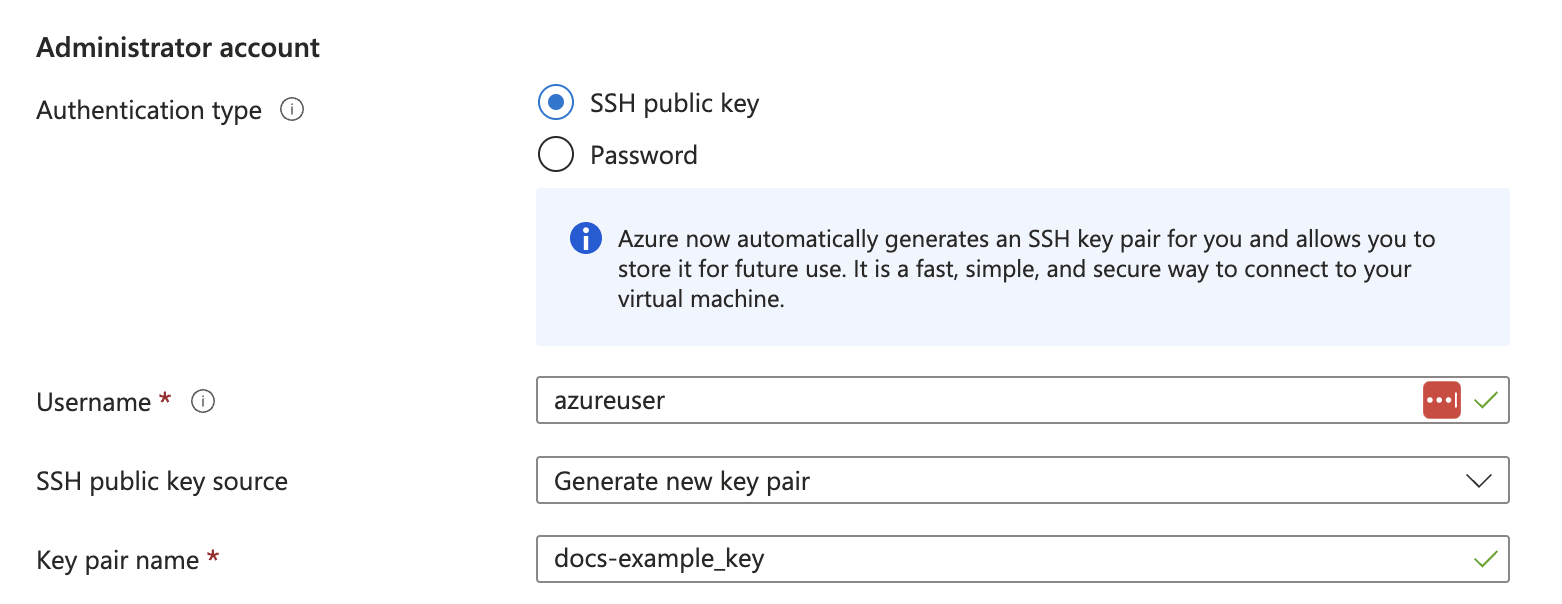
- In the Administrator account section, for Authentication type, select SSH public key or Password.
-
Enter the credential settings, depending on the authentication type.
Do not click Review + create yet. You must still set up the load balancer.
5
Set up the load balancer
- Click the Networking tab.
-
In the Networking interface section, fill out the following fields:
- Virtual network: Click Create new, or select an existing virtual network from the dropdown menu. To learn more, see Quickstart: Use the Azure portal to create a virtual network.
- Subnet: Click Manage subnet configuration, or select a new or existing subnet from the dropdown menu. To learn more, see Add, change, or delete a virtual network subnet.
- Configure network security group: Click Create new, or select an existing security group from the dropdown menu. To learn more, see Create, change, or delete a network security group.
-
In the Load balancing section, fill out the following fields:
- Load balancing options: Select Azure load balancer.
-
Select a load balancer: Click Create a load balancer and fill out the following fields in the pop-up window, or select an existing load balancer from the dropdown menu and note this name as you will need it in later steps:
- Enter a Load balancer name. Note this name, as you will need it in later steps.
- For Type, select Public or Internal.
- For Protocol, select TCP or UDP.
- Set both Port and Backend port to 80.
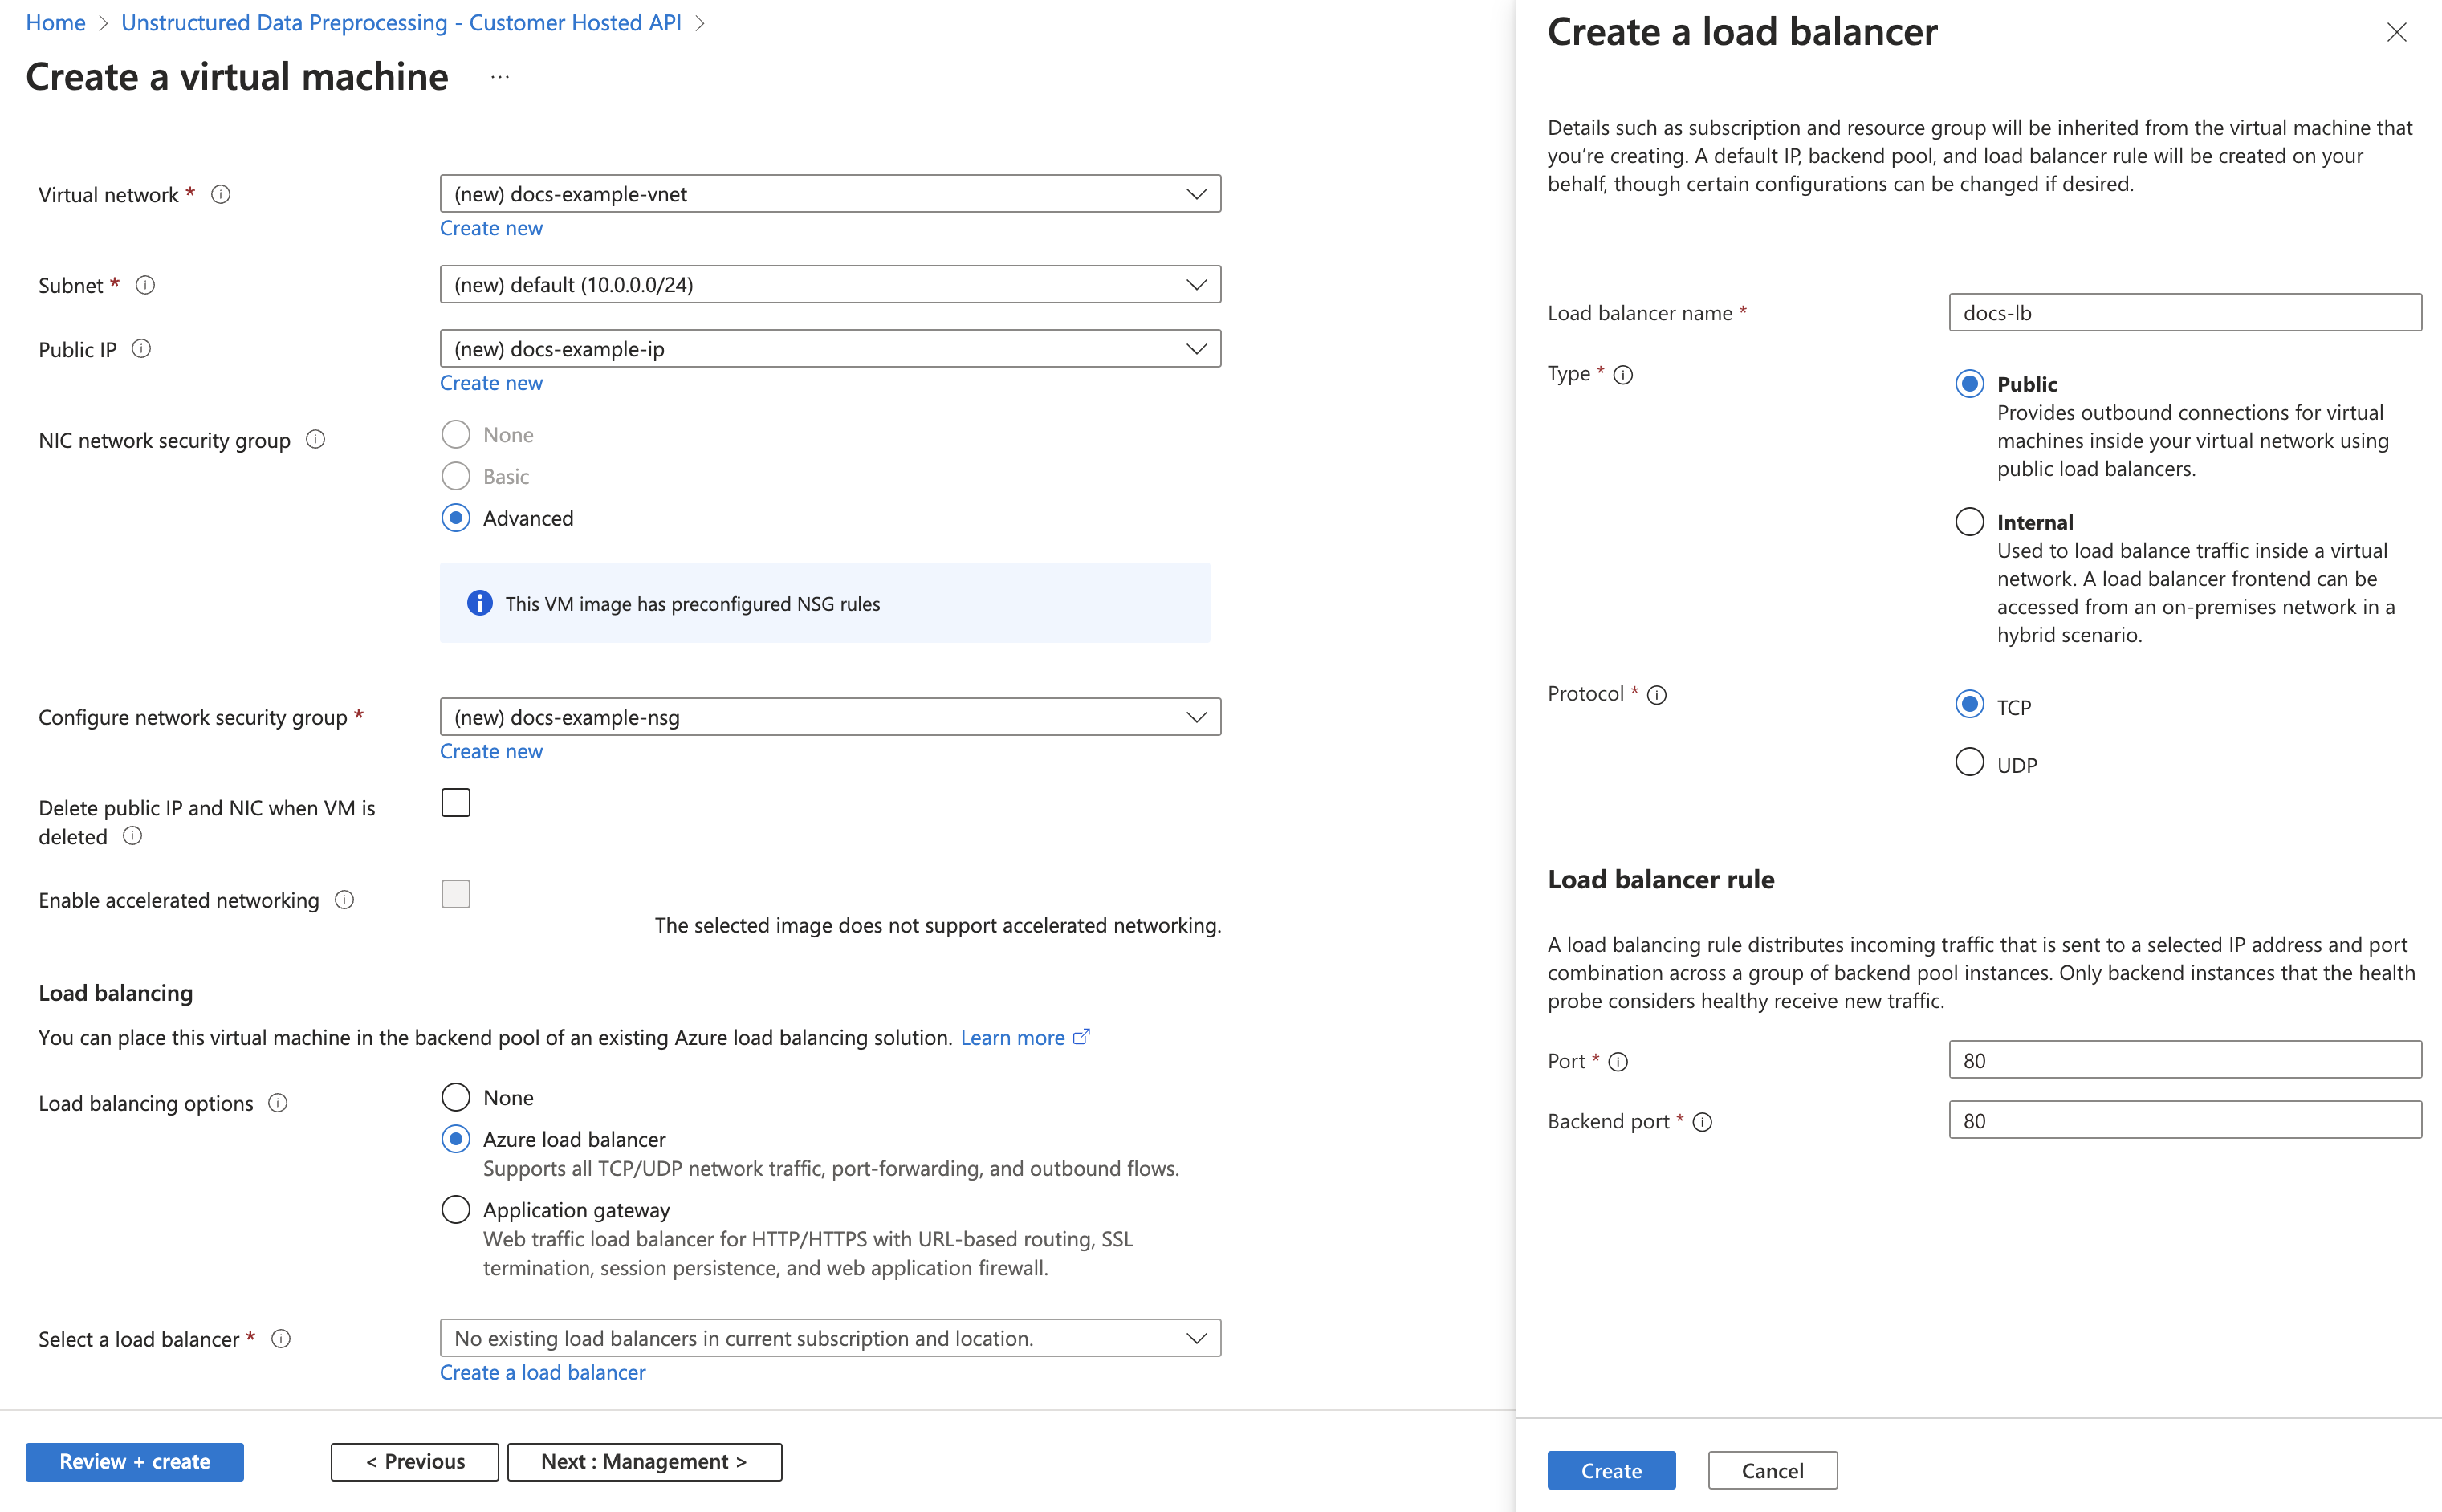
- Click Create.
6
Finalize and deploy
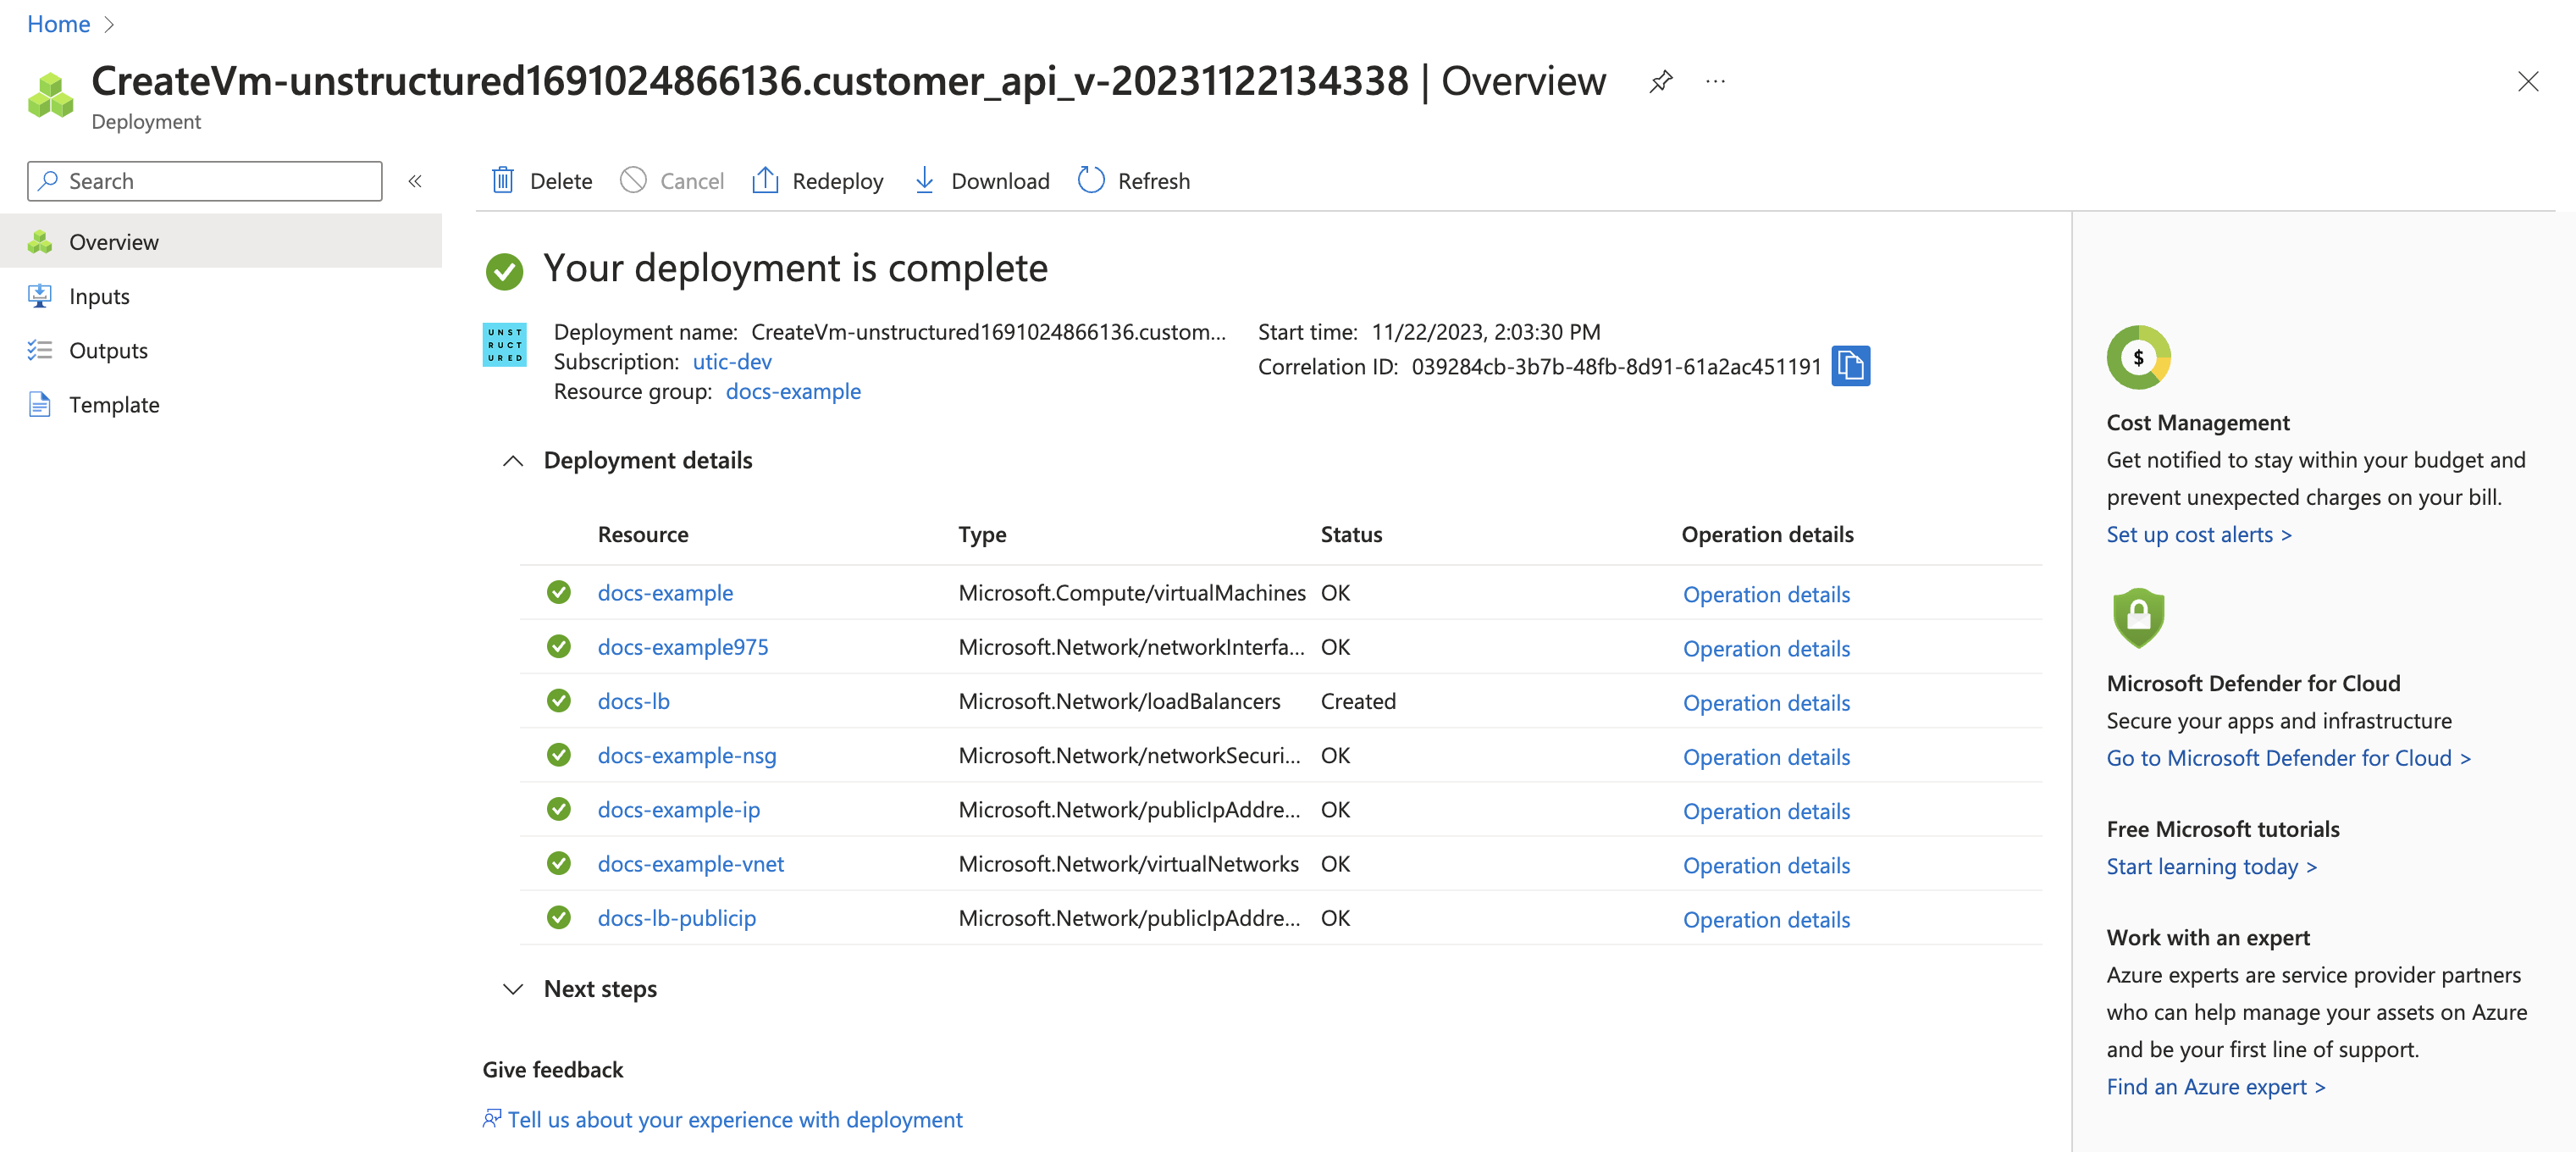
- Click Review + create.
- Wait for validation.
-
Click Create.
7
Post-deployment: additional load balancer configuration
- Go to your load balancer: in the Azure portal’s Search resources, services and docs box, enter and then select Load balancers.
- Search for and open the new load balancer that you created earlier, or the existing load balancer that you chose earlier.
- Make any necessary settings updates to your new or existing load balancer, based on the recommended configurations in the Load balancer network settings section, later on this page.
8
Post-deployment: get the deployed endpoint URL
- Go to your virtual machine: in the Azure portal’s Search resources, services and docs box, enter and then select Virtual machines.
- Search for and open the new virtual machine that you created earlier, using the name that you entered earlier.
-
On the Overview tab, under Properties, note the Public IP address for the Load balancer.
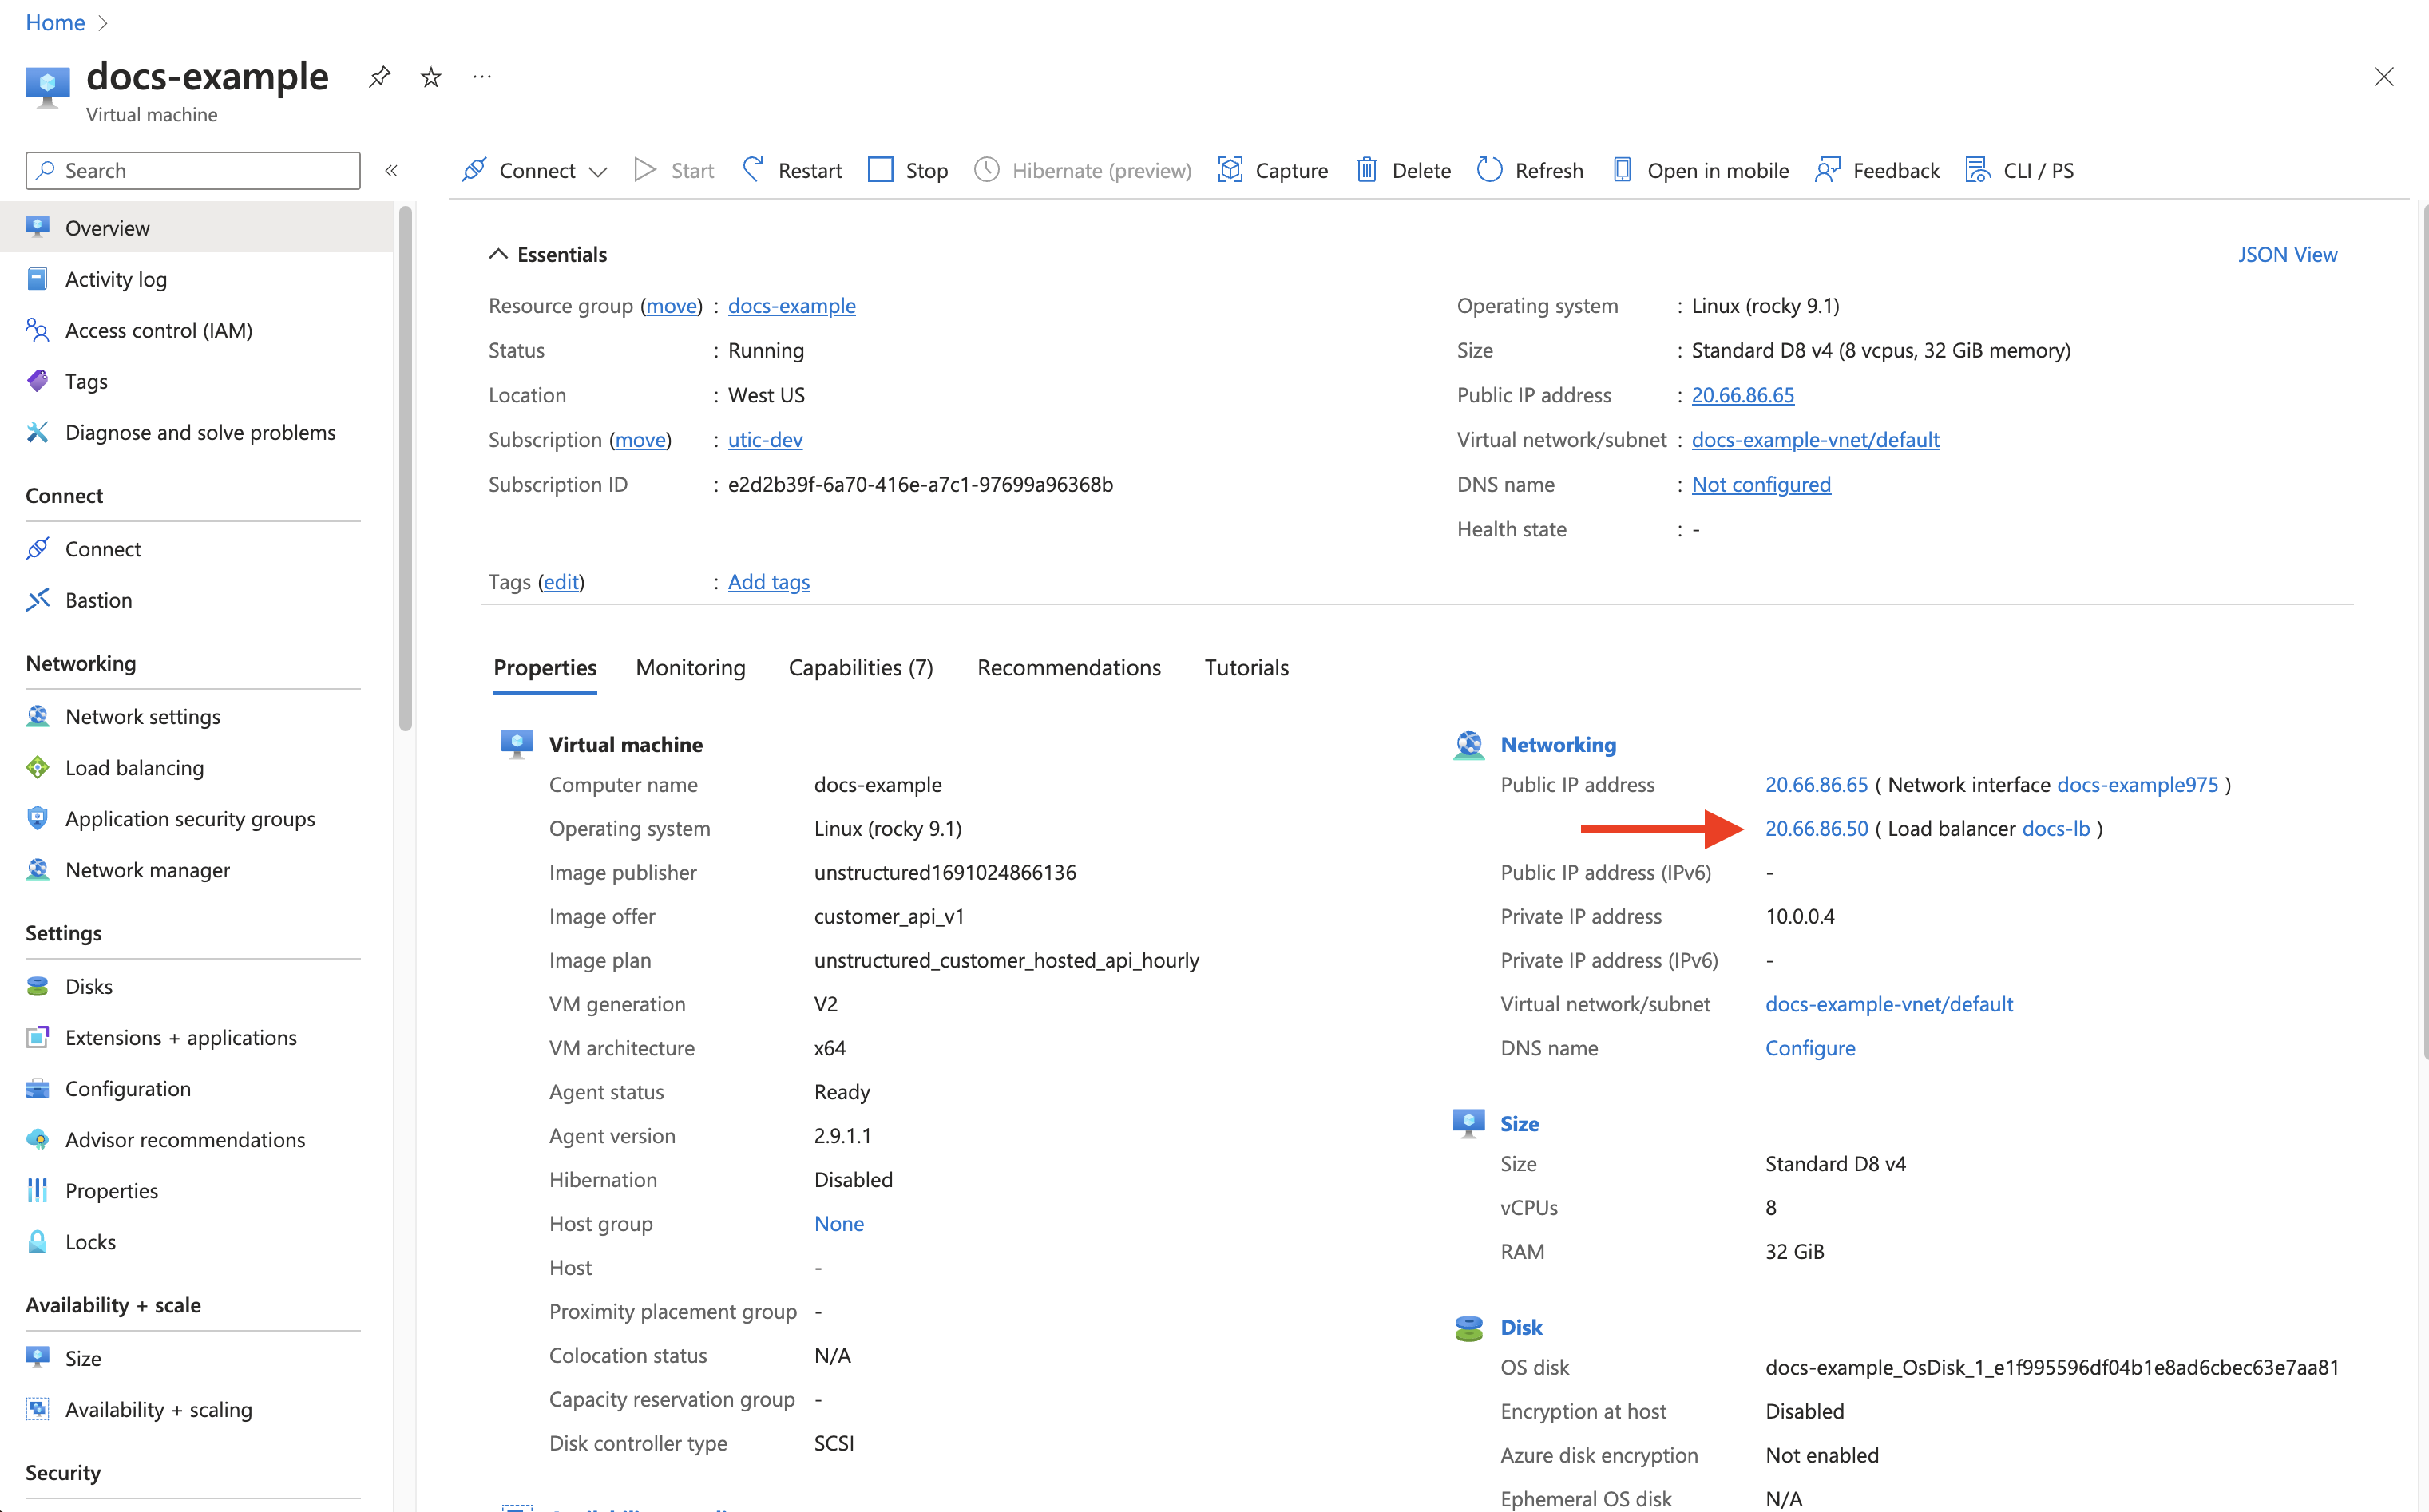
- The deployed endpoint URL is http://<load-balancer-public-IP-address>/general/v0/general. Note this endpoint URL, as you will need it later to call the Unstructured API.
9
Post-deployment: set API environment variables
Note the API environment variables in the API environment variables section, later on this page. If you need to set any of these in the Docker container on the virtual machine, do the following:
- If the virtual machine is not already running from earlier, click the Start icon.
- After the virtual machine starts, click the Connect icon, and then click Connect from the drop-down list.
- Follow the on-screen directions for one of the available options to connect to the virtual machine and display a connected terminal.
-
Stop the running container in the virtual machine, so that you can restart it later with the environment variables set: In the connected terminal, run the following command:
sudo docker container ls. -
Note the
CONTAINER IDvalue for the running container. -
Run the following command, replacing
<CONTAINER ID>with theCONTAINER IDvalue: -
Now run the container again, setting the environment variables at the same time: Run the following command:
sudo docker image ls. -
Note the
REPOSITORYandTAGvalue for the Docker image. -
Run the following command, replacing
<REPOSITORY>and<TAG>with theREPOSITORYandTAGvalues for the Docker image, and replacing<VAR1>=<value1>,<VAR2>=<value2>and so on with the environment variable name and value pairs: -
Verify that the environment variables were set correctly: Run the following command:
-
Note the
CONTAINER IDvalue for the running container. -
Run the following command, replacing
<CONTAINER ID>with theCONTAINER IDvalue:
- The environment variables should be in the list that appears.
To help manage your overall costs, you should click the Stop icon whenever you are not using this virtual machine to call the Unstructured API.
10
Call the Unstructured API
You can now use the running virtual machine to call the Unstructured API. For example, run one of the following, setting the following environment variables to make your code more portable:
- Set
UNSTRUCTURED_API_URLtohttp://, followed by your load balancer’s public IP address, followed by/general/v0/general. - Set
LOCAL_FILE_INPUT_DIRto the path on your local machine to the files for the Unstructured API to process. If you do not have any input files available, you can download any of the ones from the example-docs folder in GitHub. - Set
LOCAL_FILE_OUTPUT_DIRto the path on your local machine for Unstructured API to send the processed output in JSON format.
Ingest CLI
Ingest CLI
You must first install the Unstructured Ingest CLI.Because you are calling a private API and therefore do not need an Unstructured API key, you can omit the command-line option
--api-key Or, for better code portability, it is recommended that you first set the environment variable UNSTRUCTURED_API_KEY to an empty string and then include the command-line option --api-key.CLI
Ingest Python library
Ingest Python library
You must first install the Unstructured Ingest Python library.Because you are calling a private API and therefore do not need an Unstructured API key, you can omit the parameter
api_key. Or, for better code portability, it is recommended that you first set the environment variable UNSTRUCTURED_API_KEY to an empty string and then include the parameter api_key.Python Ingest
To help manage your overall costs, you should stop running the associated virtual machine whenever you are not using it to call the Unstructured API.
Load balancer network settings
Unstructured recommends the following load balancer settings, which you should set on your deployment’s load balancer soon after you finalize and deploy it. On the load balancer’s Overview tab in the Azure portal:- SKU: Standard
- Frontend IP configuration: Private IP
- Backend pools: VMSS
-
Health probes:
- Protocol: HTTP, or HTTPS (this requires setting up a reverse proxy on the VMSS set to do TLS termination)
- Port:
80or443(this can be any port that the backend VMs are listening on) - Path:
/healthcheck - Interval (seconds):
5
-
Load balancing rules:
- Protocol: TCP
- Port:
443for HTTPS, or80for HTTP - Backend port:
443for HTTPS, or80for HTTP - Idle timeout (minutes):
60 - Enable TCP Reset box: Checked
-
Inbound NAT rules:
- Frontend Port:
443for HTTPS, or80for HTTP - Backend port:
443for HTTPS, or80for HTTP - Protocol: TCP
- Enable TCP Reset box: Checked
- Idle timeout (minutes):
60
- Frontend Port:
API environment variables
Unstructured supports the following environment variables, which you can set in the Docker image on the virtual machine, as needed:ALLOW_ORIGINS: CORS-allowed origins.UNSTRUCTURED_ALLOWED_MIMETYPE: The list of allowed MIME types, if you want to limit the file types that can be processed.UNSTRUCTURED_API_KEY: The default Unstructured API key to use.UNSTRUCTURED_MEMORY_FREE_MINIMUM_MB: The minimum amount of free memory in MB to allow for processing a file. If this memory is too low, the server will return a503error.UNSTRUCTURED_PDF_HI_RES_MAX_PAGES: The maximum number of pages in a PDF file that the Unstructured API will not reject, if thehi_resstrategy is used. The default is300.UNSTRUCTURED_REDIRECT_ROOT_URL: If this is set, redirect aGETrequest to the Unstructured API to use this URL instead.