This walkthrough provides you with deep, hands-on experience with the Unstructured user interface (UI). As you follow along, you will learn how to use many of Unstructured’s features for partitioning, enriching, chunking, embedding, and structured data extraction. These features are optimized for turning your source documents and data into information that is well-tuned for retrieval-augmented generation (RAG), agentic AI, and model fine-tuning. This walkthrough uses two sample files to demonstrate how Unstructured identifies and processes content such as image, graphs, complex tables, non-English characters, and handwriting. These files, which are available for you to download to your local machine, include:Documentation Index
Fetch the complete documentation index at: https://docs.unstructured.io/llms.txt
Use this file to discover all available pages before exploring further.
- Wang, Z., Liu, X., & Zhang, M. (2022, November 23). Breaking the Representation Bottleneck of Chinese Characters: Neural Machine Translation with Stroke Sequence Modeling. arXiv.org. https://arxiv.org/pdf/2211.12781. This 12-page PDF file features English and non-English characters, images, graphs, and complex tables. Throughout this walkthrough, this file’s title is shortened to “Chinese Characters” for brevity.
- United States Central Security Service. (2012, January 27). National Cryptologic Museum Opens New Exhibit on Dr. John Nash. United States National Security Agency. https://courses.csail.mit.edu/6.857/2012/files/H03-Cryptosystem-proposed-by-Nash.pdf. This PDF file features English handwriting and scanned images of documents. Throughout this walkthrough, this file’s title is shortened to “Nash letters” for brevity.
This walkthrough focuses on local files for ease-of-use demonstration purposes.This walkthrough does not cover how to use
Unstructured to set up connectors to do large-scale batch processing of multiple files and semi-structured data that are stored in remote locations.
To learn how to set up connectors and do large-scale batch processing later, see the next steps after you finish this walkthrough.
Step 1: Sign up and sign in to Unstructured
Let’s get started!-
If you do not already have an Unstructured account, sign up for free.
After you sign up, you are automatically signed in to your new Unstructured Let’s Go account, at https://platform.unstructured.io.
To sign up for a Business account instead, contact Unstructured Sales, or learn more.
-
If you have an Unstructured Let’s Go, Pay-As-You-Go, or Business SaaS account and are not already signed in, sign in to your account at https://platform.unstructured.io.
For other types of Business accounts, see your Unstructured account administrator for sign-in instructions, or email Unstructured Support at support@unstructured.io.
Step 2: Create a custom workflow
In this step, you create a custom workflow in your Unstructured account. Workflows are defined sequences of processes that automate the flow of data from your source documents and data into Unstructured for processing. Unstructured then sends its processed data over into your destination file storage locations, databases, and vector stores. Your RAG apps, agents, and models can then use this processed data in those destinations to do things more quickly and accurately such as answering users’ questions, automating business processes, and expanding your organization’s available body of knowledge. Let’s get going!-
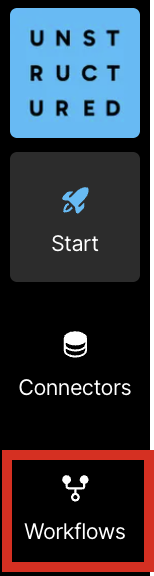
After you are signed in to your Unstructured account, on the sidebar, click Workflows.
-
Click New Workflow.

-
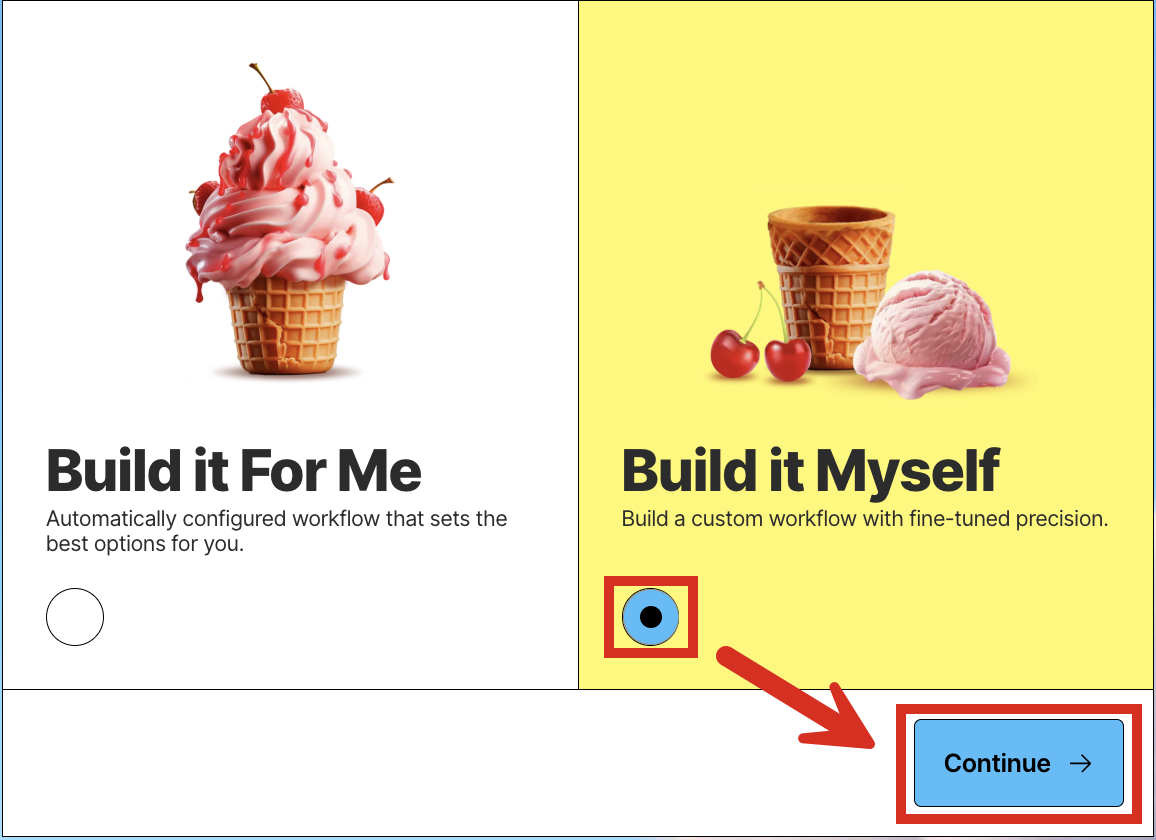
With Build it Myself already selected, click Continue.
-
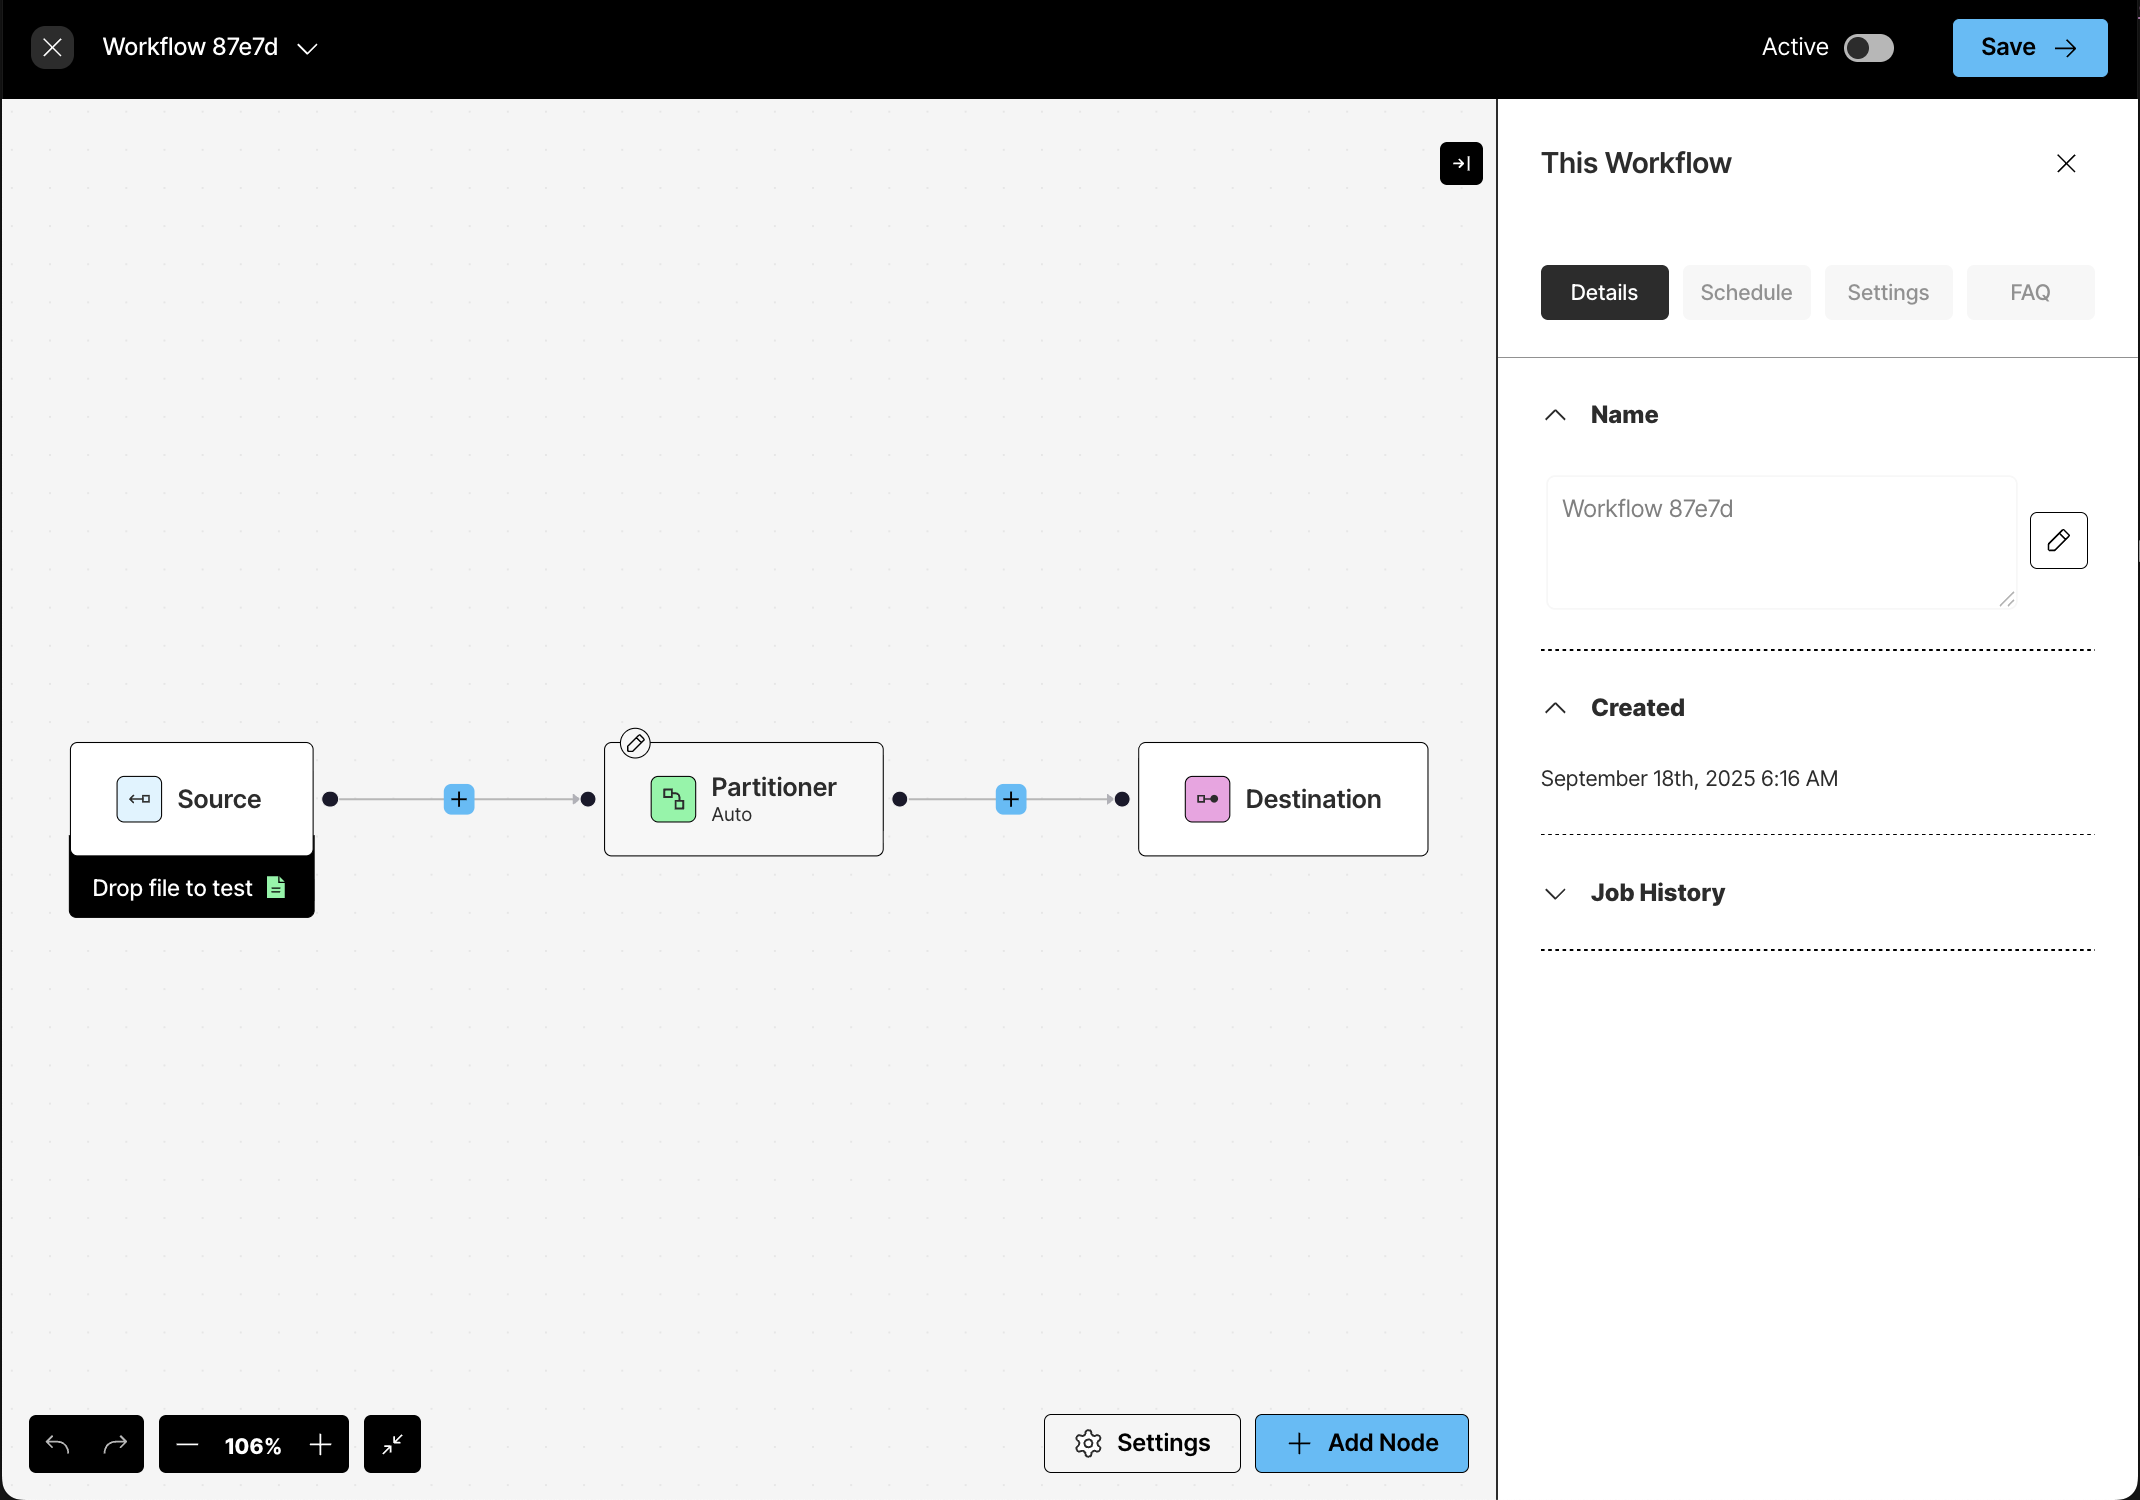
The workflow designer appears.
Step 3: Experiment with partitioning
In this step, you use your new workflow to partition the sample PDF files that you downloaded earlier onto your local machine. Partitioning is the process where Unstructured identifies and extracts content from your source documents and then outputs this content as a series of contextually-rich document elements and metadata, which are well-tuned for RAG, agentic AI, and model fine-tuning. This step shows how well Unstructured’s VLM partitioning strategy handles challenging content such as complex tables, multilanguage characters, and handwriting.-
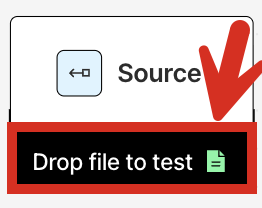
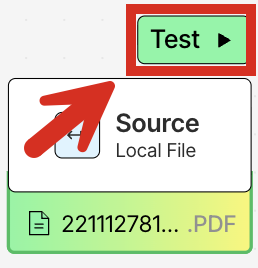
With the workflow designer active from the previous step, at the bottom of the Source node, click Drop file to test.
- Browse to and select the “Chinese Characters” PDF file that you downloaded earlier.
-
In the workflow designer, click the Partitioner node and then, in the node’s settings pane’s Details tab, select VLM.
-
Under Select VLM Model, under Vertex AI, select Gemini 2.0 Flash.
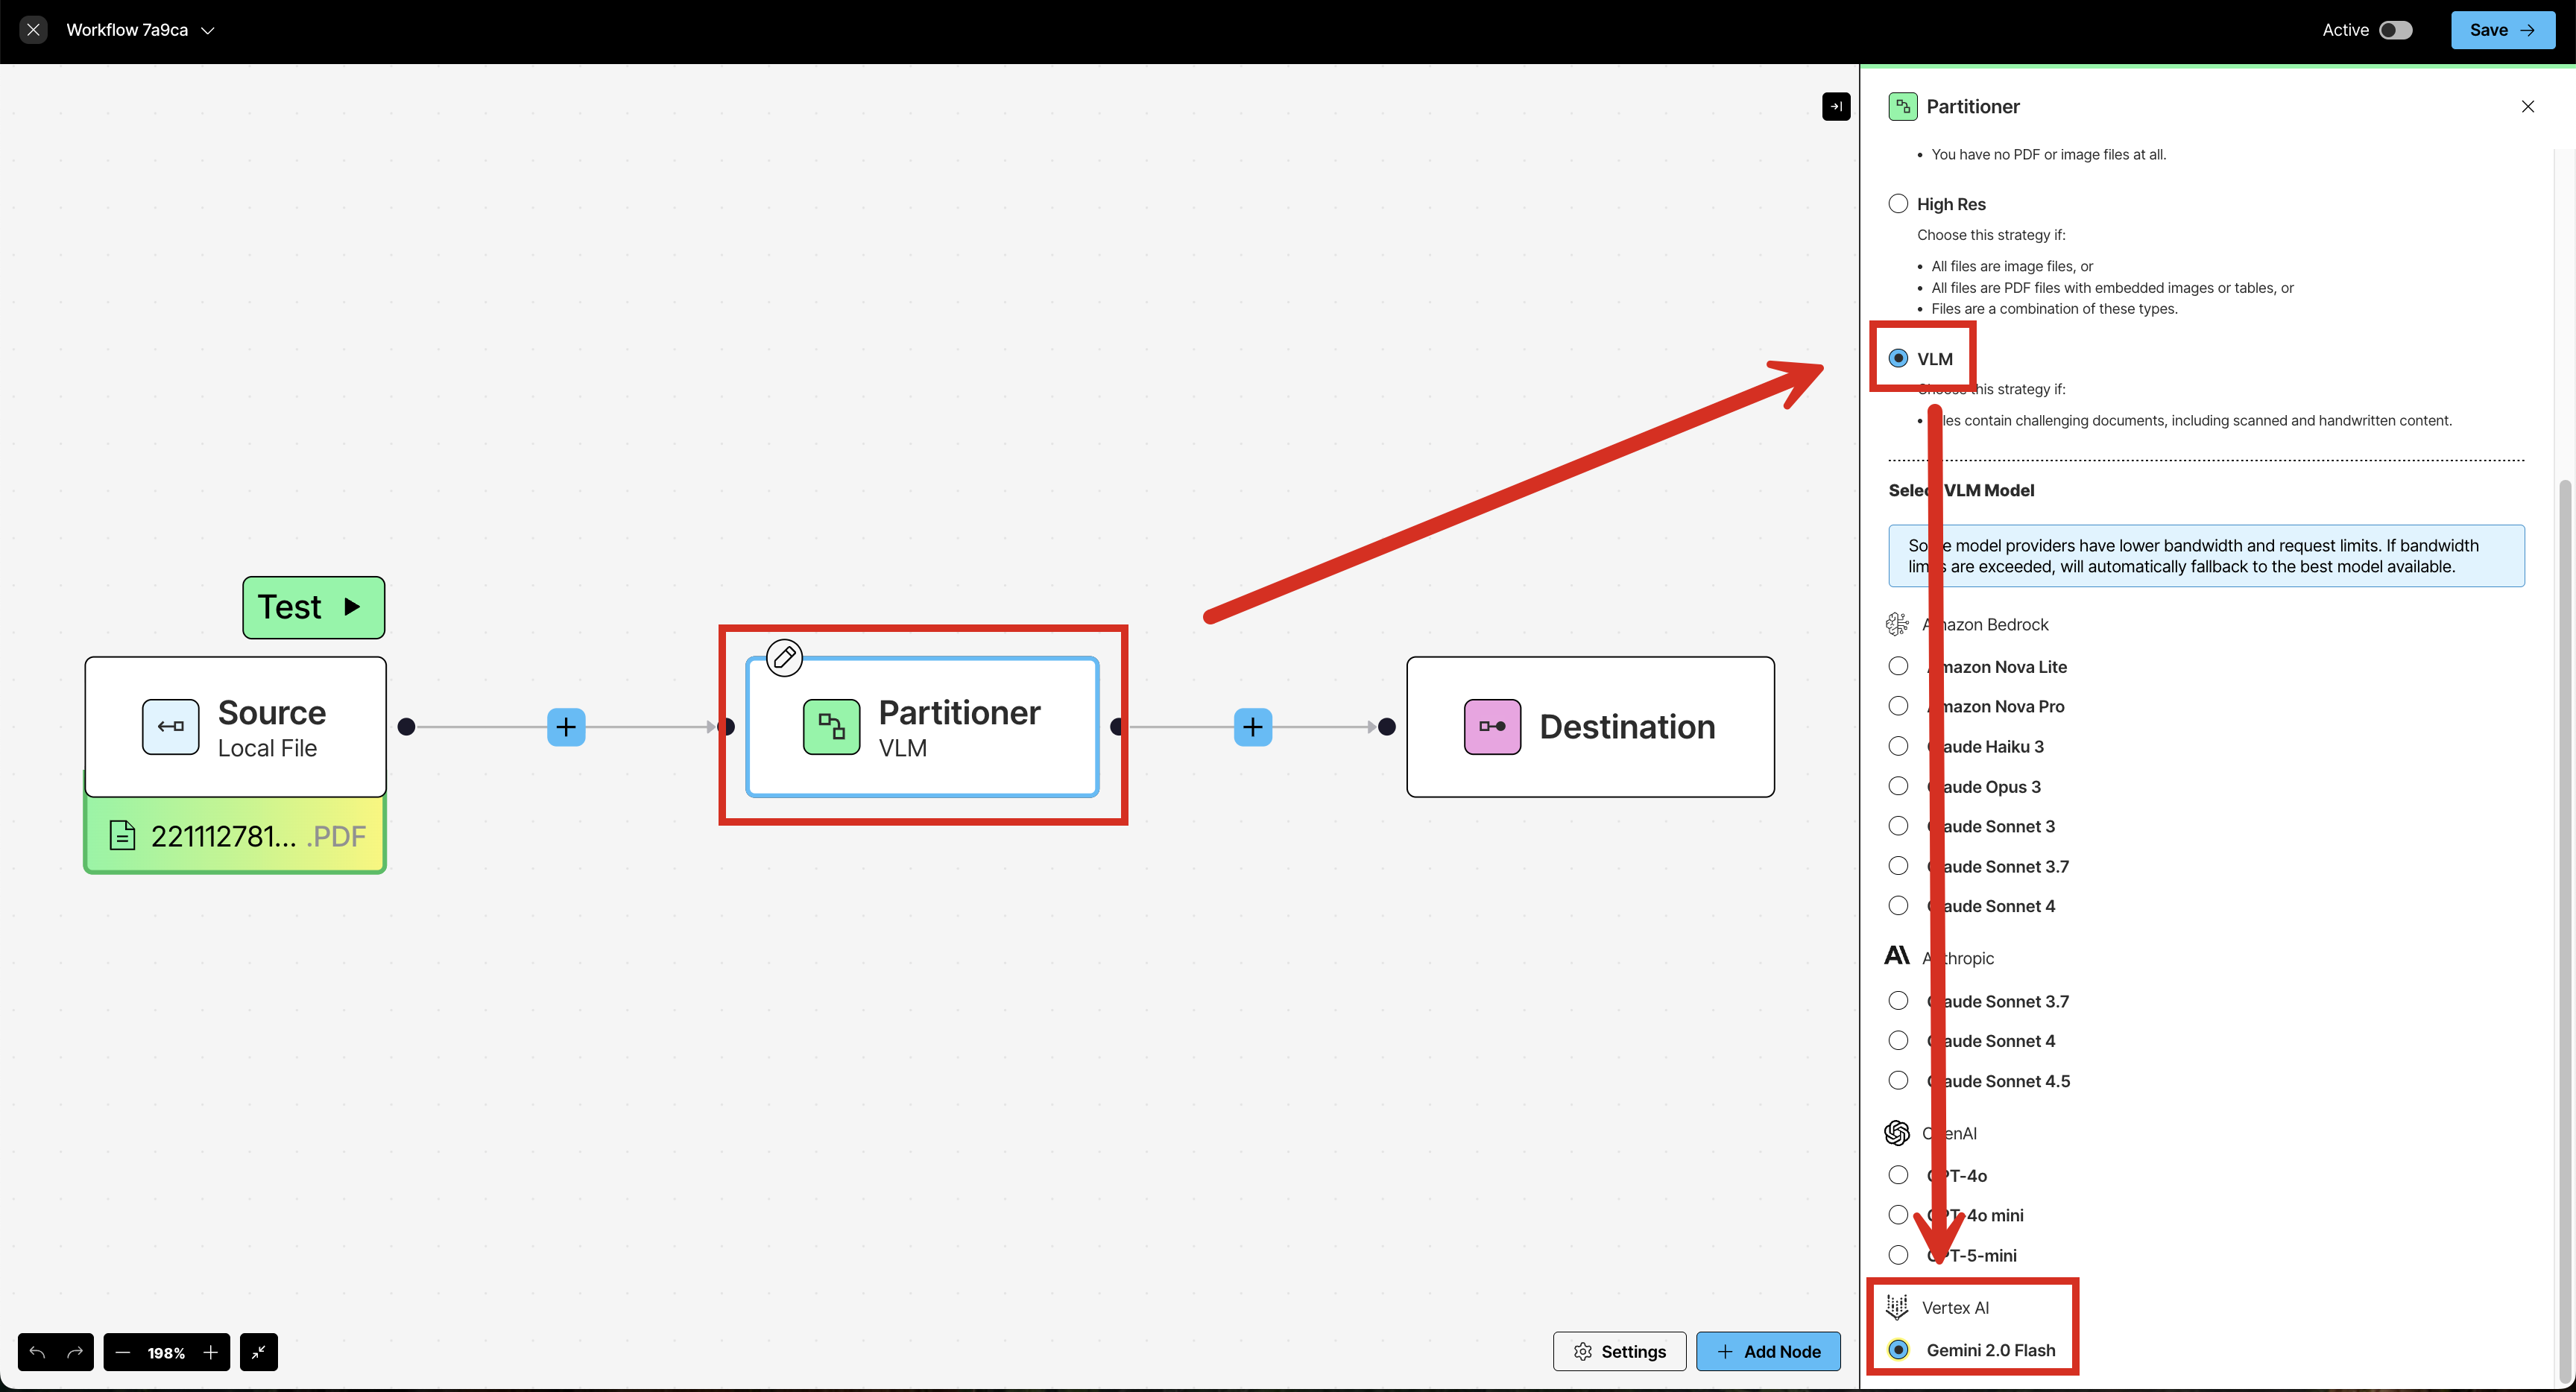 The list of available models shown is constantly being updated. Your list might also differ from the preceding screenshot, depending on your Unstructured account type. If Gemini 2.0 Flash is not available, choose another available model from the list. For a full list of the models available in Unstructured, see Available models.If you have an Unstructured Business account and want to add more models to this list, contact your Unstructured account administrator or Unstructured sales representative, or email Unstructured Support at support@unstructured.io.
 -
Click Test.
-
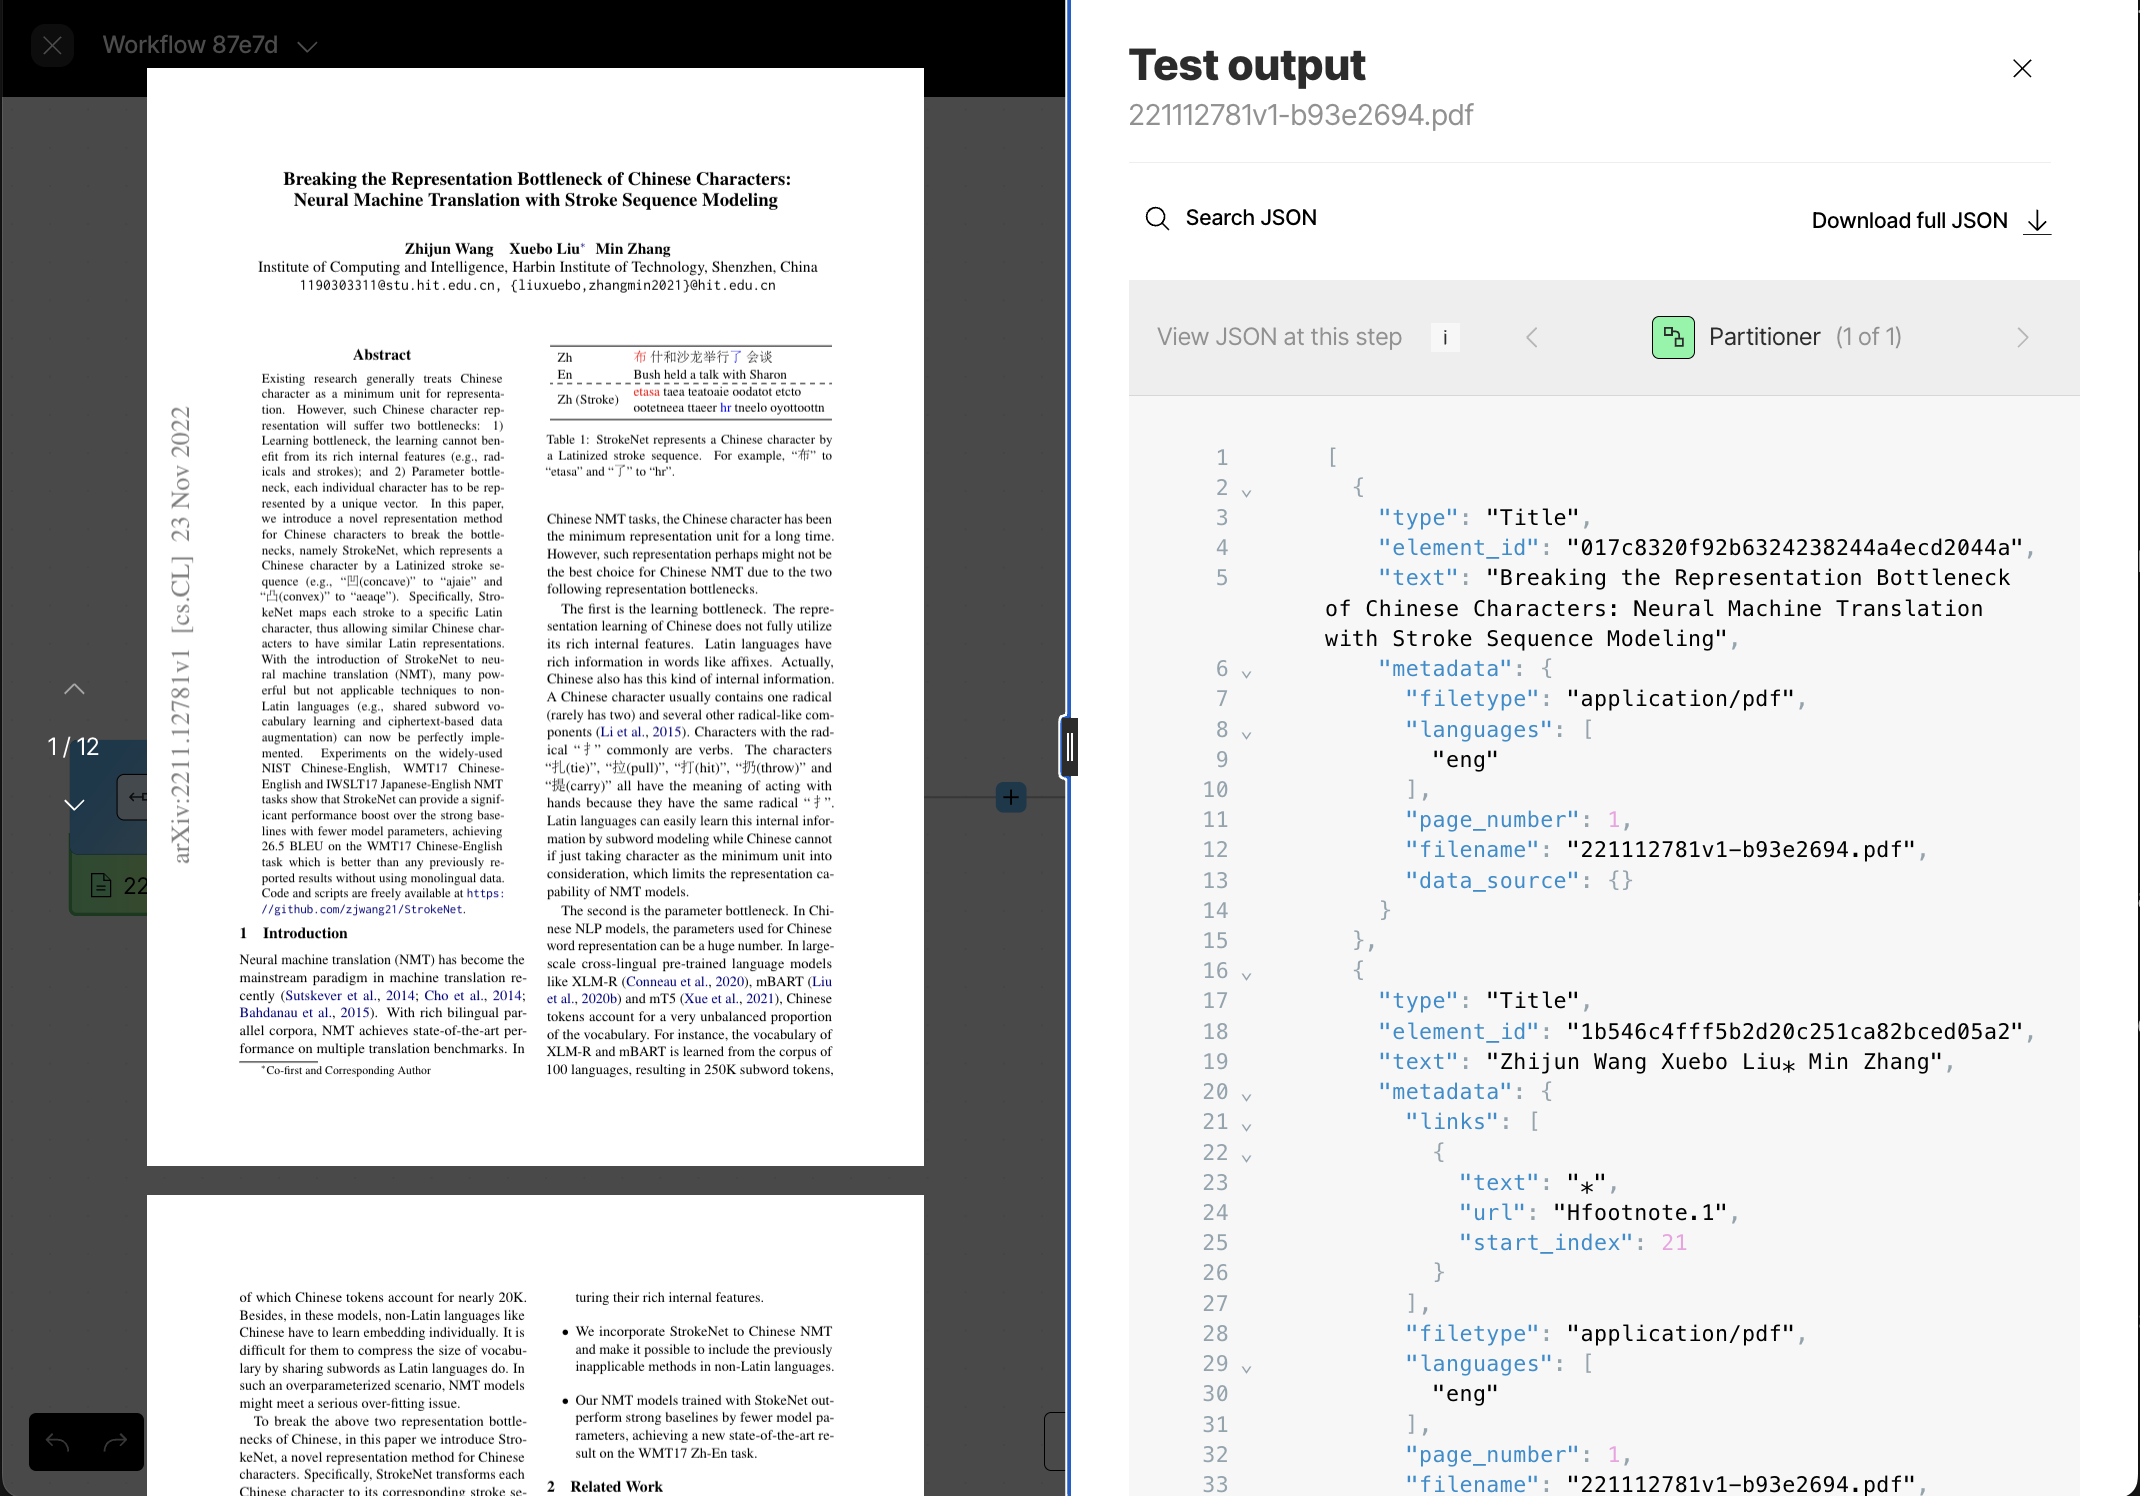
The PDF file appears in a pane on the left side of the screen, and Unstructured’s output appears in a Test output pane on the right side of the screen.
-
Notice the following in the JSON output, which you can get to by clicking Search JSON above the output:

- The Chinese characters on page 1. Search for the text
verbs. The characters. Notice how the Chinese characters are output. We’ll see accuracy improvements to this output later in Step 4 in the enrichments portion of this walkthrough. - The tables on pages 1, 6, 7, 8, 9, and 12. Search for the text
"Table"(including the quotation marks) to see how the VLM interprets the various tables. We’ll see changes to these elements’textandmetadata.text_as_htmlcontents later in Step 4 in the enrichments portion of this walkthrough. - The images on pages 3, 7, and 8. Search for the text
"Image"(including the quotation marks) to see how the VLM interprets the various images. We’ll see changes to these elements’textcontents later in Step 4 in the enrichments portion of this walkthrough.
If Search JSON is not clickable, this is probably because the JSON output is too large for the online viewer. Click Download full JSON and open the downloaded JSON file in an offline text editor (such as Visual Studio Code). Learn more. - The Chinese characters on page 1. Search for the text
-
Now try looking at the “Nash letters” PDF file’s output. To do this:
a. Click the close (X) button above the output on the right side of the screen.
b. At the bottom of the Source node, click the existing PDF’s file name.
c. Browse to and select the “Nash letters” file that you downloaded earlier to your local machine.
d. Click Test.
-
Notice the following in the JSON output:
- The handwriting on page 3. Search for the text
I have written RAND. Notice how well the handwriting is recognized. - The mimeograph on page 18. Search for the text
The system which. Notice how well the mimeographed content is recognized.
- The handwriting on page 3. Search for the text
- When you are done, be sure to click the close (X) button above the output on the right side of the screen, to return to the workflow designer for the next step.
Step 4: Experiment with enriching
In this step, you add several enrichments to your workflow, such as generating summary descriptions of detected images and tables, HTML representations of detected tables, and detected entities (such as people and organizations) and the inferred relationships among these entities.- With the workflow designer active from the previous step, change the Partitioner node to use High Res.
-
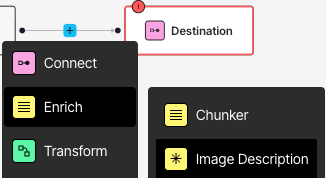
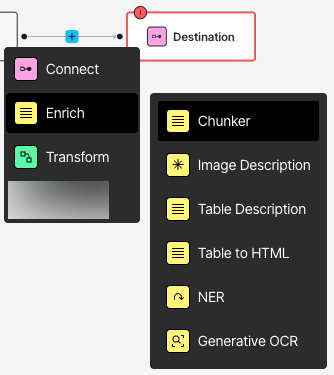
Between the Partitioner and Destination nodes, click the add (+) icon, and then click Enrich > Image Description.
-
In the node’s settings pane’s Details tab, click:
- Any available choice for Provider (for example, Anthropic).
- Any available choice for Model (for example, Claude Sonnet 4.5 if you chose Anthropic for Provider).
The lists of available models for these enrichments are constantly being updated. Your lists might also differ from these instructions, depending on your Unstructured account type. If the suggested model for an enrichment is not available, choose another available model from the list. For a full list of the models available in Unstructured, see Available models.If you have an Unstructured Business account and want to add more models to these lists, contact your Unstructured account administrator or Unstructured sales representative, or email Unstructured Support at support@unstructured.io. -
Repeat this process to add four more nodes between the Partitioner and Destination nodes, as follows:
a. Add a table description enrichment (click the add (+) icon to the right of the preceding node, and then click Enrich > Table Description).
In the node’s settings pane’s Details tab, click:
- Any available choice for Provider (for example, Anthropic).
- Any available choice for Model (for example, Claude Sonnet 4.5 if you chose Anthropic for Provider).
- If you choose Standard for Mode, any available choice for Provider (for example, Anthropic).
- If you choose Standard for Mode, any available choice for Model (for example, Claude Sonnet 4.5 if you chose Anthropic for Provider).
- If you choose Agentic for Mode, a default provider and model are automatically selected for you.
- Any available choice for Provider (for example, Anthropic).
- Any available choice for Model (for example, Claude Sonnet 4.5 if you chose Anthropic for Provider).
- Any available choice for Provider (for example, Anthropic).
- Any available choice for Model (for example, Claude Sonnet 4.5 if you chose Anthropic for Provider).

- Change the Source node to use the “Chinese Characters” PDF file, and then click Test.
- In the Test output pane, make sure that Generative OCR (6 of 6) is showing. If not, click the right arrow (>) until Generative OCR (6 of 6) appears, which will show the output from the last node in the workflow.
-
Some interesting portions of the output include the following:
- The Chinese characters on page 1. Search again for the text
verbs. The characters. Notice how the accuracy of the Chinese character output is improved. - The images on pages 3, 7, and 8. Search again for the text
"Image"(including the quotation marks). Notice the summary description for each image. - The tables on pages 1, 6, 7, 8, 9, and 12. Search again for the text
"Table"(including the quotation marks). Notice the summary description for each of these tables. Also notice thetext_as_htmlfield for each of these tables. - The identified entities and inferred relationships among them. Search for the text
Zhijun Wang. Of the eight instances of this name, notice the author’s identification as aPERSONthree times, the author’spublishedrelationship twice, and the author’saffiliated_withrelationship twice.
- The Chinese characters on page 1. Search again for the text
- When you are done, be sure to click the close (X) button above the output on the right side of the screen, to return to the workflow designer for the next step.
Step 5: Experiment with chunking
In this step, you apply chunking to your workflow. Chunking is the process where Unstructured rearranges the resulting document elements’text content into manageable “chunks” to stay within the limits of an AI model and to improve retrieval precision.
-
With the workflow designer active from the previous step, just before the Destination node, click the add (+) icon, and then click Enrich > Chunker.
- In the node’s settings pane’s Details tab, select Chunk by Character.
-
Under Chunk by Character, specify the following settings:
- Check the box labelled Include Original Elements.
- Set Max Characters to 500.
- Set New After N Characters to 400.
- Set Overlap to 50.
- Leave Contextual Chunking turned off and Overlap All unchecked.

- With the “Chinese Characters” PDF file still selected in the Source node, click Test.
- In the Test output pane, make sure that Chunker (7 of 7) is showing. If not, click the right arrow (>) until Chunker (7 of 7) appears, which will show the output from the last node in the workflow.
-
To explore the chunker’s results, search for the text
"CompositeElement"(including the quotation marks). -
Optionally, you can try running this workflow again with the Chunk by Title strategy, as follows:
a. Click the close (X) button above the output on the right side of the screen.
b. In the workflow designer, click the Chunker node and then, in the node’s settings pane’s Details tab, select Chunk by Title.
c. Under Chunk by Title, specify the following settings:- Check the box labelled Include Original Elements.
- Set Max Characters to 500.
- Set New After N Characters to 400.
- Set Overlap to 50.
- Leave Contextual Chunking turned off, leave Combine Text Under N Characters blank, and leave Multipage Sections and Overlap All unchecked.
e. In the Test output pane, make sure that Chunker (7 of 7) is showing. If not, click the right arrow (>) until Chunker (7 of 7) appears, which will show the output from the last node in the workflow.
f. To explore the chunker’s results, search for the text"CompositeElement"(including the quotation marks). Notice that the lengths of some of the chunks that immediately precede titles might be shortened due to the presence of the title impacting the chunk’s size. -
Optionally, you can try running this workflow again with the Chunk by Page strategy, as follows:
a. Click the close (X) button above the output on the right side of the screen.
b. In the workflow designer, click the Chunker node and then, in the node’s settings pane’s Details tab, select Chunk by Page.
c. Under Chunk by Page, specify the following settings:- Check the box labelled Include Original Elements.
- Set Max Characters to 500.
- Set New After N Characters to 400.
- Set Overlap to 50.
- Leave Contextual Chunking turned off, and leave Overlap All unchecked.
e. In the Test output pane, make sure that Chunker (7 of 7) is showing. If not, click the right arrow (>) until Chunker (7 of 7) appears, which will show the output from the last node in the workflow.
f. To explore the chunker’s results, search for the text"CompositeElement"(including the quotation marks). Notice that the lengths of some of the chunks that immediately precede page breaks might be shortened due to the presence of the page break impacting the chunk’s size.
-
Optionally, you can try running this workflow again with the Chunk by Similarity strategy, as follows:
a. Click the close (X) button above the output on the right side of the screen.
b. In the workflow designer, click the Chunker node and then, in the node’s settings pane’s Details tab, select Chunk by Similarity.
c. Under Chunk by Similarity, specify the following settings:- Check the box labelled Include Original Elements.
- Set Max Characters to 500.
- Set Similarity Threshold to 0.99.
- Leave Contextual Chunking turned off.
e. In the Test output pane, make sure that Chunker (7 of 7) is showing. If not, click the right arrow (>) until Chunker (7 of 7) appears, which will show the output from the last node in the workflow.
f. To explore the chunker’s results, search for the text"CompositeElement"(including the quotation marks). Notice that the lengths of many of the chunks fall well short of the Max Characters limit. This is because a similarity threshold of 0.99 means that only sentences or text segments with a near-perfect semantic match will be grouped together into the same chunk. This is an extremely high threshold, resulting in very short, highly specific chunks of text.
g. If you change Similarity Threshold to 0.01 and run the workflow again, searching for the text"CompositeElement"(including the quotation marks), many of the chunks will now come closer to the Max Characters limit. This is because a similarity threshold of 0.01 provides an extreme tolerance of differences between pieces of text, grouping almost anything together.
- When you are done, be sure to click the close (X) button above the output on the right side of the screen, to return to the workflow designer for the next step.
Step 6 (Optional): Experiment with embedding
In this step, you generate embeddings for your workflow. Embeddings are vectors of numbers that represent various aspects of the text that is extracted by Unstructured. These vectors are stored or “embedded” next to the text itself in a vector store or vector database. Chatbots, agents, and other AI solutions can use these vector embeddings to more efficiently and effectively find, analyze, and use the associated text. These vector embeddings are generated by an embedding model that is provided by an embedding provider. For the best embedding model to apply to your use case, see the documentation for your target downstream application toolsets.-
With the workflow designer active from the previous step, just before the Destination node, click the add (+) icon, and then click Transform > Embedder.

-
In the node’s settings pane’s Details tab, under Select Embedding Model, for Azure OpenAI, select Text Embedding 3 Small [dim 1536].
The list of available embedding models is constantly being updated. Your list might also be different, depending on your Unstructured account type. If Azure OpenAI and Text Embedding 3 Small [dim 1536] is not available, choose another available model from the list. For a full list of the models available in Unstructured, see Available models.If you have an Unstructured Business account and want to add more models to this list, contact your Unstructured account administrator or Unstructured sales representative, or email Unstructured Support at support@unstructured.io.
- With the “Chinese Characters” PDF file still selected in the Source node, click Test.
- In the Test output pane, make sure that Embedder (8 of 8) is showing. If not, click the right arrow (>) until Embedder (8 of 8) appears, which will show the output from the last node in the workflow.
-
To explore the embeddings, search for the text
"embeddings"(including the quotation marks). - When you are done, be sure to click the close (X) button above the output on the right side of the screen, to return to the workflow designer so that you can continue designing things later as you see fit.
Step 7: Experiment with structured data extraction
In this step, you apply custom structured data extraction to your workflow. Structured data extraction is the process where Unstructured automatically extracts the data from your source documents into a format that you define up front. For example, in addition to Unstructured partitioning your source documents into elements with types such asNarrativeText, UncategorizedText, and so on, you can have Unstructured
output key information from the source documents in a custom structured data format, within a DocumentData element containing aJSON object with custom fields such as name, address, phone, email, and so on.
-
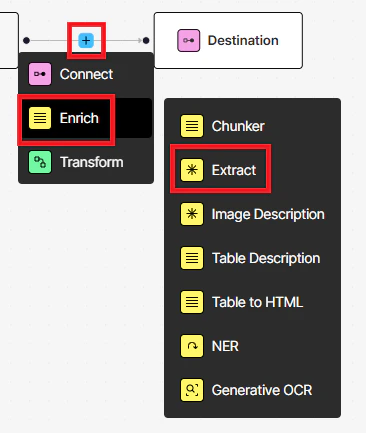
With the workflow designer active from the previous step, just before the Destination node, click the add (+) icon, and then click Enrich > Extract.
-
In the node’s settings pane’s Details tab, under Provider, select Anthropic. Under Model, select Claude Sonnet 4.5. This is the model that Unstructured will use to do the structured data extraction.
The list of available models for structured data extraction is constantly being updated. Your list might also be different, depending on your Unstructured account type. If Anthropic and Claude Sonnet 4.5 is not available, choose another available model from the list. For a full list of the models available in Unstructured, see Available models.If you have an Unstructured Business account and want to add more models to this list, contact your Unstructured account administrator or Unstructured sales representative, or email Unstructured Support at support@unstructured.io.
- Click Upload JSON.
-
in the JSON Schema box, enter the following JSON schema, and then click Use this Schema:
- With the “Chinese Characters” PDF file still selected in the Source node, click Test.
- In the Test output pane, make sure that Extract (9 of 9) is showing. If not, click the right arrow (>) until Extract (9 of 9) appears, which will show the output from the last node in the workflow.
-
To explore the structured data extraction, search for the text
"extracted_data"(including the quotation marks). - When you are done, be sure to click the close (X) button above the output on the right side of the screen, to return to the workflow designer so that you can continue designing things later as you see fit.
Next steps
Congratulations! You now have an Unstructured workflow that partitions, enriches, chunks, embeds, and extracts structured data from your source documents, producing context-rich data that is ready for retrieval-augmented generation (RAG), agentic AI, and model fine-tuning. Right now, your workflow only accepts one local file at a time for input. Your workflow also only sends Unstructured’s processed data to your screen or to be saved locally as a JSON file. You can modify your workflow to accept multiple files and data from—and send Unstructured’s processed data to—one or more file storage locations, databases, and vector stores. To learn how to do this, try one or more of the following quickstarts:- Remote quickstart - This quickstart shows you how to begin processing files and semi-structured data from remote source locations at scale, instead of just one local file at a time.
- Dropbox source connector quickstart - If you don’t have any remote source locations available for Unstructured to connect to, this quickstart shows you how to set up a Dropbox account to store your documents in, and then connect Unstructured to your Dropbox account.
- Pinecone destination connector quickstart - If you don’t have any remote destination locations available for Unstructured to send its processed data to, this quickstart shows you how to set up a Pinecone account to have Unstructured store its processed data in, and then connect Unstructured to your Pinecone account.
- Unstructured API quickstart - This quickstart uses the Unstructured API’s workflow operations to programmatically create a Dropbox source connector and a Pinecone destination connector in your Unstructured account. You then programmatically add these connectors to a workflow in your Unstructured account, run that workflow as a job, and then explore the job’s results.
- Unstructured Python SDK - This article provides an overview of the Unstructured Python SDK and how to use it.
- Unstructured API overview - This article provides an overview of the Unstructured API and how to use it.